
Battles in Scottish History
From 84AD to the late 1880’s, Scots have battled.
So much so, it seems like a part of our culture.
The Buchanans were active in various military operations for Scotland. They supported Bruce during the Scottish Wars of Independence and later fought at Flodden in 1513 and at Pinkie in 1547. They were represented among the 7000 men sent from Scotland to assist the French king after the Battle of Agincourt.
We have fought internally and externally with the Spanish, French and English. We fight with fervour and viciousness, that enhanced the fearsome Scottish reputation.
Battles varied from territorial incursion or Clan quests for lands, simple raids or land wars with the English, long sieges, to killings/massacres/retributions that were just horrific.
To our knowledge Clan Buchanan did not wage any of these battles, however, clansmen were part of numerous conflicts, particularly when their lands were threatened. There were many skirmishes and raids on neighbouring clans’ cattle. It is of note that many battles occurred on the Highland/Lowland border (which are the traditional lands of Clan Scotland) and at Stirling and Glasgow (which are neighbouring locations).
Dates are all AD (Anno Domini, AKA: "in the year of our Lord Jesus Christ")…
-
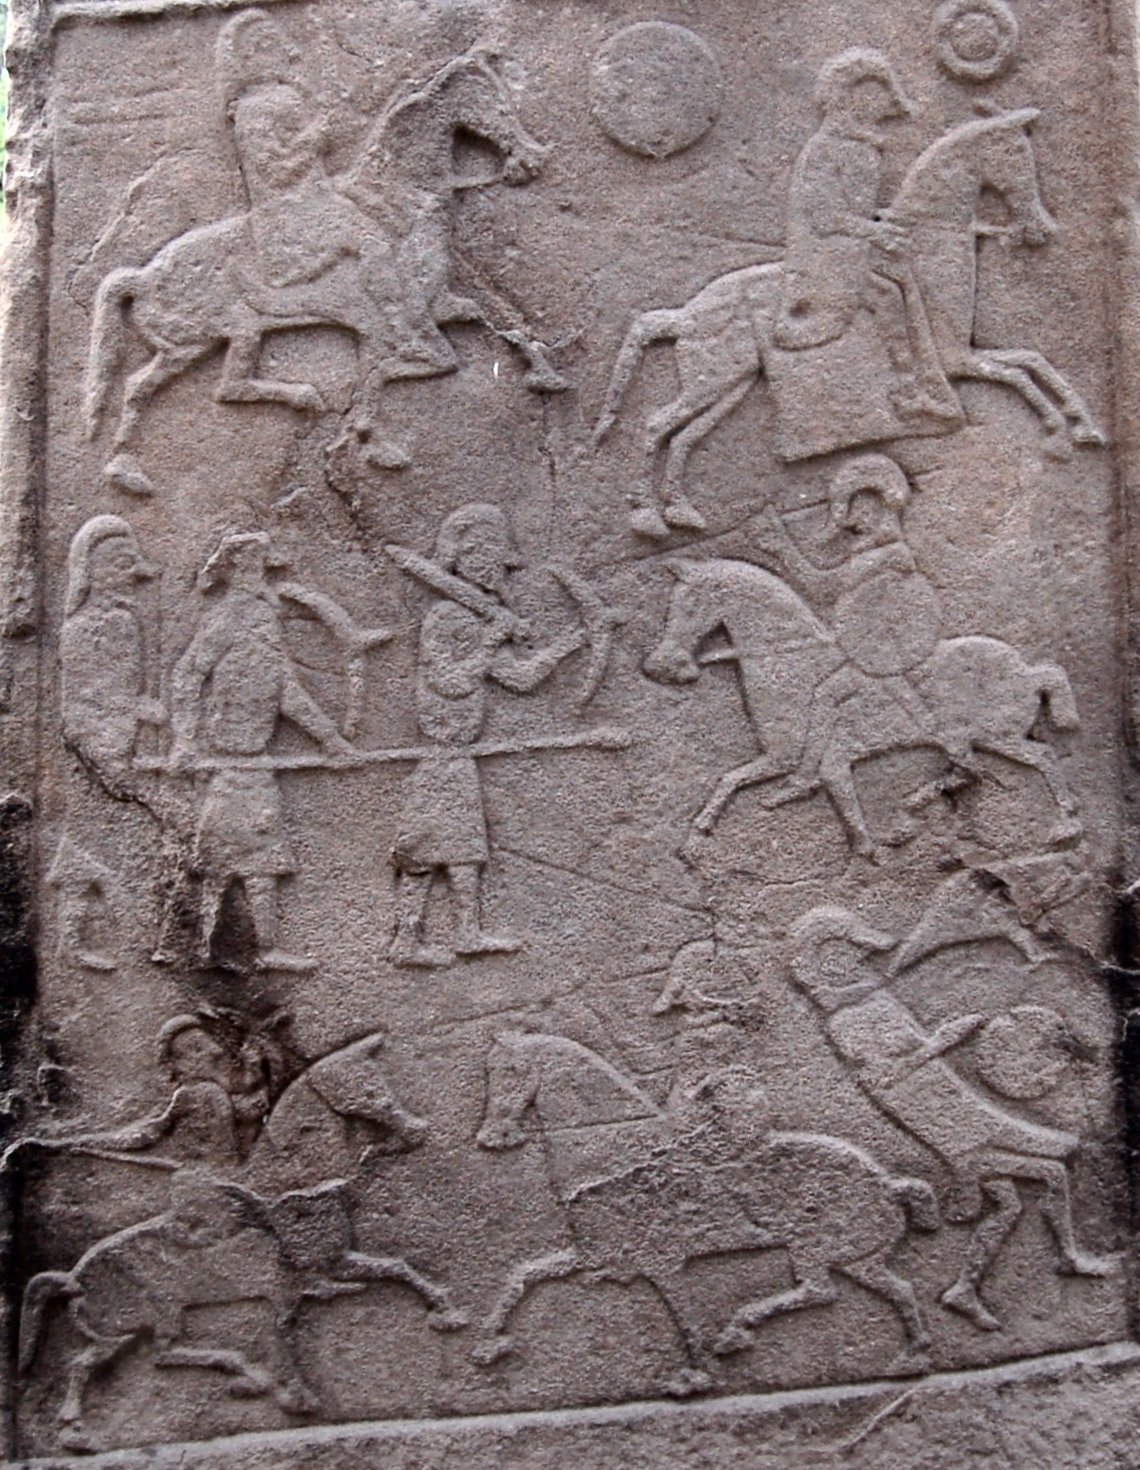
Circa 84 AD
The Caledonians were the last to be subdued by the Romans in the British Isles.
The Roman governor in Britan – Julius Agricola, had sent his fleet ahead to panic the Caledonians, and, with light infantry reinforced with British auxiliaries, reached the site, which he found occupied by the enemy.
Even though the Romans were outnumbered in their campaign against the tribes of Britain, they had difficulties in getting their foes to face them in open battle.
After many years of avoiding the fight, the Caledonians were forced to join battle when the Romans marched on the main granaries of the Caledonians, just as they had been filled from the harvest. The Caledonians had no choice but to fight or starve over the next winter.
The Caledonian irregulars were no match for the discipline of the legions. It is estimated that a total of 20,000 Romans faced 30,000 Caledonian warriors, and a further assembly of wives and children.
After a brief exchange of spears/missiles, Agricola ordered auxiliaries to close with the enemy and the Caledonians were pushed back up the hill.
Those at the top attempted an outflanking movement, but were themselves outflanked by Roman cavalry.
The Caledonians were then comprehensively routed and fled for the shelter of nearby woodland, but were relentlessly pursued by well-organised Roman units.
It is said that the Roman Legions took no part in the battle, being held in reserve throughout.
According to Tacitus (the Historian of the Roman Empire), 10,000 Caledonian lives were lost at a cost of only 360 Romans. 20,000 Caledonians escaped and Roman scouts were unable to locate them.
Following this final battle, it was proclaimed that Agricola had finally subdued all the tribes of Britain and it was claimed that Agricola had finally succeeded in subduing the tribes of Britain.
The site of the battle is unknown but presumably lies in the Scottish Highlands near the hill of Bennachie in Aberdeenshire on the border between the Highlands and the Lowlands. Numerous claims make further suggestions that the battle may have taken place on Gask. There is further speculation that the decisive victory may have taken place in Sutherland and was an exaggeration, either by Tacitus himself, or by Agricola, for political reasons.
-
The Battle of Degsastan was fought around 603 between King Æthelfrith of Bernicia and the Gaels under Áedán Mac Gabráin, King of Dál Riada.
Æthelfrith's smaller army won a decisive victory, although his brother Theodbald was killed.
Very little further is known about the battle. The location of the nominal Degsastan is not known, either; Dawstane in Liddesdale, Scotland, is a possibility.
Æthelfrith had won many victories against the Britons and was expanding his power and territory, and this concerned Áedán, who led "an immense and mighty army" against Æthelfrith.
Although Æthelfrith had the smaller army, Bede reports that almost all of Áedán's army was slain, and Áedán himself fled. After this defeat, according to Bede, the Irish Kings in Britain would not make war against the English again, right up to Bede's own time (130 years later).
Áedán's army included the Bernician exile Hering, son of the former Bernician King Hussa; his participation is mentioned by the Anglo-Saxon Chronicle (manuscript E, year 603), and may indicate dynastic rivalry among the Bernicians.
Áedán's army also included the Cenél Eógain prince Máel Umai Mac Báetáin, who is said by Irish sources to have slain Eanfrith, brother of Æthelfrith.
Áedán survived as King of Dál Riata until 608 when he was succeeded by his youngest son Eochaid Buide. Æthelfrith died in battle in 616.
-
The Battle of Nechtansmere was fought on 20 May 685AD and was a decisive victory for the Picts, led by Brude MacBile.
Northumbria's King Ecgfrith was killed in the fighting and the victory allowed the Picts to force the Northumbrians further south, reversing gains they'd made during the previous decades.
-
Circa 735 AD
Angus (or Oengus) King of Picts is said to have won a great battle against Athelstane, King of Northumbria, in the area of today's East Lothian
Tradition has it that on the eve of the battle, King Angus prayed to Saint Andrew, Patron Saint of Scotland, and, the following morning, a cross of white cloud against a blue sky was seen.
Legend says King Athelstane fled from the battlefield, but was killed close to today's village of Athelstaneford.
Regarding the battle it is said that in 832 Óengus mac Fergusa, King of the Picts was pursued by a Northumbrian host led by their leader Athelstane.
The Scots were forced to make a stand in an area some 2.5 km to the north of the modern village of Athelstaneford and there ensued a long and bloody battle across the narrows of the Peffer Burn.
In desperation Óengus called for divine intervention and Saint Andrew seems to have answered by shaping the clouds into a cross.
As expected the Northumbrians were beaten and the white cross on a blue background has been the Scottish flag ever since.
The site of the battle is the present day farm of Prora (a field there is still called the Bloody Lands).
Legend also has it that King Athelstane was decapitated and his head placed on a pole on an island in the Firth of Forth, however conflicting reports that a King Athelstane is also on record as having existed at the end of the following century, and that he won a great battle against the Scots under their King Constantine at Brunanburh.
-
King Athelstane, a grandson of Alfred the Great, was allegedly the first King of all England.
In 937 AD, King Constantine II of Alba invaded England with Welsh and Danish support and, according to the Annals of Ulster, was conclusively defeated.
The exact location of the battle is unknown but it is thought to have been on Merseyside.
It was The Battle of Brunanburh that defined the countries that we now know as England, Scotland and Wales.
At the time of the battle in 937, Britain was a divided nation, ruled by several Kings and Earls all vying for land and power.
In the far north there were the Celts, divided into two main Kingdoms; Alba (mainly in Scotland) led by Constantine, and Strathclyde (nowadays SW Scotland, Cumbria and parts of Wales) ruled by Owein.
At the same time, Northern England was ruled by a set of Norse Earls of Viking decent, together known as the Earls of Northumberland.
The Norse also held power over much of Ireland and were led by Olaf Guthfrithsson, The King of Dublin.
The final group, the Anglo Saxons, controlled the majority of central and southern England.
Headed up by King Athelstan of Wessex, the Anglo Saxon fiefdoms at this time were merely an alliance and not yet united under a single King.
Since the late 8th century, invading Vikings from Scandinavia had been pushing southwards and encroaching into Anglo-Saxon territory.
At the same time, the Anglo Saxons had been consolidating their territory in the south, forging alliances between the fiefdoms, holding the Vikings back from the north and pushing the Celts further into the West.
All of this came to a head in 928AD, when the Anglo Saxons led by Athelstan attempted to repel further Viking encroachment by taking a pre-emptive strike against the Viking Kingdom of York.
The battle was a victory for the Anglo Saxons, although this led the nearby Celtic King Constantine to become increasingly concerned over his monarchy; after all, if Athelstan had attacked the Vikings at York, what would stop him continuing north and challenging Celtic territory.
He immediately reacted, and began forging links with neighbouring Kingdoms. To build links with the Norse, Constantine married his daughter to Olaf Gutherfrithsson, the King of Dublin.
This in turn brought both the Irish and Northumbrian Norsemen under his alliance.
Building links with the neighbouring Celtic Kingdom was much easier, as Owen of Strathclyde was related to Constantine and took little persuasion to join in a pre-emptive strike against Athelstan.
Constantine built an army and in 937AD this newly formed Celtic/Norse army began marching south into England, seeking battle against Athelstan.
At the same time, Athelstan was able to bring together the Anglo Saxon noblemen and armies with relative ease.
In the summer of 937 that the two armies met at Brunanburh for what was to be one of the bloodiest battles ever held on British soil, as detailed in the Anglo-Saxon Chronicles:
“No slaughter yet was greater made e’er in this island, of people slain, before this same, with the edge of the sword”
-
This battle was fought at Carham-on-Tweed in England between the Scots, led by Malcolm II and Owen of Strathclyde, against the Northumbrian army.
The battle was fought against Earl Uhtred of Bamburgh and his Northumbrian army at Carham, near Roxburgh is generally believed to have been fought in 1018, though it may have been two years earlier, in 1016.
The outcome was victory for Malcolm and the restoration of Lothian to Scotland, however there are no surviving details of the battle itself except for the outcome being a Scottish victory and an English loss.
It is traditionally believed that the victory significantly increased Scotland’s hold on Lothian; however there is a school of thought that the area was in fact granted to Kenneth II by England’s Edgar the Peaceful in 973, and that the battle actually led to no significant change to the control of Lothian.
The ensuing Scottish victory established Scotland's possession of the Lothians.
-
This was the confrontation in Aberdeenshire where Macbeth was killed by Malcolm Canmore with the support of the Saxon King Edward the Confessor.
Canmore was determined to avenge his father, Duncan I, who had been killed by his own men led by Macbeth in 1040.
The Battle of Lumphanan was fought on 15 August 1057, between Macbeth, King of Scots, and Máel Coluim mac Donnchada, the future King Malcolm III.
Macbeth was killed, having drawn his retreating forces north to make a last stand. According to tradition, the battle took place near the Peel of Lumphanan in Aberdeenshire.
Macbeth's Stone, some 300 metres (980 feet) south-west of the peel, is said to be the stone upon which Macbeth was beheaded.
Since the death of his father, King Duncan, in battle with Macbeth, Malcolm had been sheltered by Earl Siward of Northumbria.
With Siward's backing, Malcolm first attacked Macbeth at Dunsinnan in 1054, failing to win the crown, but he regained his own lands.
After retreating North, Macbeth would again face Malcolm in battle at Lumphanan. The battle itself appears to have been a comparatively minor affair, except for the death of Macbeth.
Following Macbeth’s death, his stepson Lulach was initially crowned King.
18 weeks later, in 1058 Malcolm killed him by 'treachery' at Essie, near Aberdeen.
Upon assuming the throne, Malcolm began the long task of removing Gaelic culture from mainstream Scotland.
-
The House of Moray was distantly related to the rival House of MacAlpin.
The first monarch of the House of Moray was MacBeth, mormaer of Moray, son of Finlech MacRory, Mormaer of Moray and Donada, the daughter of Malcolm II, who married Gruoch, the grand¬daughter of Kenneth III,
Macbeth defeated Duncan I in battle at Elgin (or murdered him shortly thereafter) and took the throne of Scotland on 14th August 1040.
He was determined, resolute and ambitious and an able King and ruled Scotland for seventeen years.
Malcolm Canmore, the son of Duncan, took revenge for the murder of his father and killed Macbeth in battle at Lumphanan, Aberdeenshire, on the 15th of August, 1057.
25 year old Lulach, the son of Macbeth's wife Gruoch by her first husband Gillacomgain, was proclaimed King by supporters of the House of Moray in 1057.
The tide was against them and the reign of Lulach proved to be a brief one.
Malcolm Canmore again revenged himself upon the House of Moray and killed Lulach in battle at Essie in Strathbogie on the 17th of March, 1058.
Lulach had reigned for a mere seven months.
Malcolm Canmore became Malcolm III, King of Scots and the House of Moray was never again to occupy the throne of Scotland.
-
King Stephen marched an army to Cowton Moor in Yorkshire In support of his niece, Matilda, who claimed the English throne in opposition to the incumbent David I of Scotland (who was married to another of his nieces),
The English commander, William de Aumale, heard the roar of the Scots army even before it appeared out of the early morning mists.
Thousands of semi-clad Galwegians leading the Scottish attack raced toward the nervous Anglo-Norman army, closing the distance from 400 to 300 to 200 yards.
De Aumale gave the command for the archers to fire. The air was suddenly filled with missiles as those Scots who carried shields took the first arrows on them, screaming their war cry, “Albion!” The English then began to use direct fire, shooting at the lower extremities of the howling Scots.
With a moan, the first ranks fell apart under this fire. But the battle-hardened Scots leaped over their wounded and dying and continued to close on the frantically firing English.
The Battle of the Standard had begun.
January 1138 - David’s nephew, William Fitz-Duncan, laid siege to the border town of Wark, a holding of the Norman noble Walter l’Espec.
David felt that northern England might have been ripe for revolt, but Stephen quickly pre-empted a revolt as he moved north in early February.
The Scots were brutal with the English. As the Gesta notes, “So King David summoned all to arms, and giving them free license he commanded them to commit against the English, without pity, the most savage and cruel deeds he could invent.”
Stephen’s move north was not just to relieve the siege of Wark, but to check on the loyalties of his northern nobles and raid southern Scotland as well, showing his royal power and military abilities to one and all.
The Scots sought to bring the English to battle on the northern bank of the Tweed River, but Stephen would not be drawn into such a poor position and instead marched through the lowlands, devastating the country as he went before finally running low on supplies.
After this, Stephen withdrew his army to Northampton to meet with his nobles over a troubling development.
Matilda’s half-brother, the Earl of Gloucester, had taken advantage of the King’s absence to rise in open rebellion along with other nobles, causing Stephen to become “marvellously vexed.”
This allowed David to invade northern England again, crossing the border in mid-April, capturing the Bishop of Durham’s castle at Norham.
This convinced at least one powerful northern noble, Eustace Fitz-John, to join the Scots, turning over his castles to them.
This was a situation where a powerful army provided an expedient reason to switch loyalties.
Matilda had supporters, many of them sitting by, simply awaiting a reason or an excuse to declare for her.
In May 1138, Wark still remained in English hands. In fact, David was embarrassed when a sortie by the garrison managed to capture a Scottish supply train as it rode past the town.
The Scots did have some good news, however, when a force of Scots and allied Galwegians (from Galloway in Scotland), led by King David’s nephew, Fitz-Duncan, defeated an Anglo-Norman force at Clitharoe on June 10.
David’s hopes of an uprising by the English in the north in support of him were quashed by the depravations committed by the invading Scots.
By July the Earl of Gloucester again raised the banner of rebellion in support of Matilda in England, and David saw his chance once more, King Stephen being involved in a growing civil war at home.
Gathering his largest following yet, a reported 26,000 men—more likely 12,000-14,000—David marched south toward Durham, aiming to lay siege to it and then move into Yorkshire.
in late July, his army, was made up of the Gaelic highland and Galwegian clans, lowlander spearmen, Islemen, Anglo-Norman rebels, sons of English families desiring to return to their homeland after self-imposed exile, and Eadgar Atheling, the Saxon exiled heir to the English throne.
Leaving the rebel Anglo-Norman Eustace Fitz-John in charge of the continuing siege of Wark, the Scottish army surged south.
Many northern nobles were forced to make a choice between loyalty and pragmatism.
If they supported the wrong side, they would lose their land as well as their titles and, at the moment, Stephen’s power seemed to be declining.
Henry of Huntingdon (not the same man as King David’s son) noted that Norman knights comprised an important part of David’s army, no doubt proving that the proximity of the Scottish king and his army swayed many to join what they perceived as the winning side.
It fell to the aging Archbishop Thurstan of York to rally the Anglo-Normans in opposition to the Scots.
Thurstan at age 68,, limited to riding in a litter, rallied the forces to fight the Scots. He was greatly aided by the Scots themselves.
As Henry of Huntingdon related, the Scots “ripped open pregnant women, tossed children on the points of their spears, butchered priests at the altars, and, cutting off the heads from the images on crucifixes, placed them on the bodies of the slain.”
H.A. Cronne wrote, “the Scottish fury aroused the nearest thing to national resistance that 12th-century England saw—the old fighting spirit of the Anglo-Scandinavian north.”
Thurstan made this not just a military war of national defence, but a “holy war” against the hated ancient enemy.
By appealing not only to their loyalty and honour, but also to their faith in God to right the wrongs brought about by the Scots upon the Church and its clergymen,
Thurstan appealed to his countrymen to not to be threatened by the “utter savages” from the north, those “breechless and barbarous Scots.”
One reference in the Chronicle of Man and the Sundreys describes the Galwegians, who made up a good portion of the Scots army, as: “That detestable army, more atrocious than pagans, reverencing neither God nor man, plundered the whole province of Northumberland, destroyed villages, burned towns, churches, and houses.
They spared neither age nor sex, murdering infants in their cradles and other innocents at the breasts, with the mothers themselves, thrusting them through with their lances, or the points of their swords, and glutting themselves with the misery they inflicted.”
The Sheriff of Yorkshire, Walter l’Espec, described as a huge man with black hair and a flowing beard, “his eyes large and penetrating,” called out the English militia, or levy fyrd of Derby and Nottingham.
Although fairly numerous, these levy foot were of uncertain value, especially when fighting the ravaging Scots, who were constantly at war with England or their neighbouring clans. In any event, large numbers of them did flock to the support of their archbishop and sheriff, eager to avenge wrongs done to family and friends by the hated Galwegians.
Other nobles also joined in the defence of the north, including William Peuerell of Nottingham, Robert Bruce, William de Percy, Walter and Gilbert de Lacy, and Ralph, the Bishop of Durham.
Although involved with his own problems in the south, Stephen managed to send a small force north to assist the northerners in their struggle.
Bernard de Balliol entered York with a body of knights in time to join in the plans being made to counter the Scottish invasion.
To add to the ecclesiastical spirit of the “holy war,” Thurstan and Ralph had a silver casket, carrying consecrated host, placed in a wagon that had a mast from which flew the banners of St. Peter of York, St. John of Beverley, and St. Wilfred of Ripon.
This would be the rallying point of the English army, an object of religious significance that could not in any true Christian heart be allowed to be lost to the enemy.
The English levies, along with the nobles and their retinues of knights, mustered at York and by mid-August had determined to meet the Scots in open battle, a strategy promoted by Thurstan.
Although no official commander-in-chief was named, Ralph of Durham found himself selected as spiritual leader when Thurstan could not undertake the physical trials necessary to conduct a rigorous military campaign.
William de Aumale and Walter l’Espec, being the most influential nobles present, became the military commander of the army.
The English army began marching north from York to Thirsk astride the Scottish line of advance, and emissaries were sent ahead to meet with the Scots to negotiate.
What the English leaders expected from this is uncertain, but it did buy time for reinforcements from Derby and Nottingham to arrive along with 124 knights and their retinues, swelling the English ranks.
Bernard de Balliol and Robert Bruce were the emissaries, and they met with David, who rejected their “logic” that he was actually leading the enemies of his people, the Galwegians, against his real allies and friends, the Anglo-Normans.
They also offered the earldom of Northumbria to David’s son, Prince Henry, but David refused them.
David and his son felt they owed no loyalty to a king who had repudiated his own sworn allegiance to Matilda.
Their loyalties and honour lay with their family and Scotland, not King Stephen.
William Fitz-Duncan reportedly broke off the talks at that point and both English nobles renounced their friendship to David and returned to their army.
On August 21, English scouts brought word that the Scottish army was advancing down the Great North Road toward them.
The Anglo-Normans subsequently planned to steal a night march on the Scots and attack them in a surprise assault at dawn on the 22nd.
Advance elements of the Scottish army, perhaps having the same thoughts, blundered into the English army in the early morning fog, causing both forces to immediately fall into some kind of battle order, not easy in the best of situations, on two low hills, approximately 600 yards apart.
William de Aumale formed his army up on a low hill, with the wagon carrying the standards positioned in the very middle of his forces.
This provided a convenient focus and, according to Richard of Hexham, “in doing this their hope was that our Lord Jesus Christ … might be their leader in the contest.
They also provided for their men a certain and conspicuous rally-point.”
Most of the knights and retainers were then ordered to dismount, their horses being sent to the rear along with a few hundred men who remained mounted to provide a mobile reserve.
As Richard continues, “the greater part of the knights became foot soldiers, a chosen body of whom, interspersed with archers, were arranged in the front rank” of the English army.
Various reasons were given for why the English dismounted their knights.
Richard of Hexham says they dismounted so the horses would not be panicked by the noise and shouting of the Scots.
Aelred, abbot of Rievaulx, noted that the reason was so “that nobody could ride away,” while the noted historian C. Warren Hollister wrote that “Northallerton was almost Hastings in reverse,” where the Saxon influence on the tactics of the Normans, ie, dismounting in a static defense, could now be used along with archer fire to disrupt and thwart an enemy attack.
As the English army formed into battle lines, the dismounted knights were placed in the front ranks, with the levies, both bow- and spear-armed, placed behind them.
As Aelred noted, “The most vigorous knights [were] placed on the front line, so inserted spearmen and archers that, protected by the arms of the knights … shields were joined to shields.”
Leaders de Aumale and l’Espec, along with a number of knights, were stationed around the wagon bearing the standards in case the Scots did manage to break through on the highest point of the hill they occupied.
Ralph, as spiritual leader of the English and speaking for Thurstan, then absolved any who fell in this battle from their earthly sins, as Pope Urban had absolved the Crusaders who marched to Jerusalem 40 years before.
He then spoke to the dismounted knights formed up in the front of the army. “Normans … no one ever withstood you…. [The Scots] have neither military skill, nor order in fighting, nor self-command.
There is, therefore, no reason to fear.
They do not cover themselves with armour … [while] your head is covered with the helmet, your breast with a coat of mail, your legs with greaves, and your whole body with a shield….
What have we to fear in attacking the naked bodies of men who know not the use of armour is it their numbers.
Numbers, without discipline, [hinder] success in the attack….
But I close … as I perceive them rushing on, and I am delighted they are advancing in disorder.”
Indeed, David’s impetuous Galwegian allies were already surging through the dissipating morning mists, howling their war cries.
The Scottish king had formulated a different plan of battle, but it had quickly gone awry.
Initially, David hoped to emulate the Norman tactics of William the Conqueror at Hastings, using his small number of archers to open gaps in the English ranks through which his knights would ride, destroying the English order and routing the uneasy levies.
He also may have given thought to dismounting his own knights, using them with his archers to open a hole in the English ranks through which the Galwegians and Highlanders would attack.
Needless to say, the battle plan could not be implemented because the Galwegians refused to be left in the rear, away from the “honor” of leading the attack.
One chieftain proclaimed, “Why trust to the goodwill of these Frenchmen [the knights]? None of them, for all his mail, will go so far to the front as I, who fight unarmoured in today’s battle.”
Declaring that armor was “an impediment rather than a protection,” and that they, not the knights, had won at the Battle at Clitharoe, the Galwegians were entitled to lead the attack.
An Anglo-Norman rebel knight challenged the Galwegian chieftain for these statements and David, hoping to keep his army from self-destructing and knowing the fierce resolve of the Galwegian chieftains Donald and Ulgerich, reluctantly acceded to their demands.
As the Scottish army formed up into its respective divisions, David assigned his various leaders their commands.
He would remain with the centre and the reserves, flying his banner, the Dragon Standard of Wessex.
His son, Prince Henry, would command the heavy cavalry, numbering only 200 men according to Florence of Worcester, as well as most of the archers.
Fitz-Duncan would ostensibly be in command of the first lines of Galwegians, though they would obey their own local leaders before an Anglo-Norman noble.
As the Galwegians charged, David hoped they would at least clear some lanes through which his impetuous, frenzied troops could force their way into the enemy lines.
The Chronicle tells us that at the first clash, the Galwegian “men of Lothian” attacked the English lines “with a cloud of darts [javelins] and their long spears,” while the English “archers mingled with the knights, pierced the un-armored Scots with a cloud of arrows.”
The Scots did, in fact, cause the English levies to waver, but the dismounted Anglo-Norman knights held their ranks.
The English archers fired volleys of arrows into the struggling Galwegians.
Aelred noted that the un-armoured Scots “[looked] like hedgehogs with the shafts still sticking in their bodies.”
Robert Bruce, apparently visible to the Scots where he stood in the English array, was loudly taunted as a traitor by David’s knights.
The Galwegians charged once more, this time pushing back the English lines, causing consternation in their ranks, but once again the dismounted knights held, cutting down their unarmored foe.
Curiously, the bulk of the Scottish army apparently did little but sit and watch as their allies were slowly decimated.
Then one commander saw his chance to make a difference.
Prince Henry, timing his attack, suddenly ordered his 200 heavy cavalry and the infantry under his command to attack the English left flank.
The cavalry very quickly outstripped their foot supports and smashed into the English lines.
Fierce fighting found the heavy cavalry cutting right through the English ranks, but losing much of their strength in the furious hand-to-hand combat.
The knights managed to cut their way through the English, but instead of heading toward the standards and trying to capture them, which would probably have caused a major blow to morale among the thousands of English levies, Henry led his attack against the English horse, behind the army, fully expecting his foot supports to follow him and complete his rout of the English left.
Unfortunately for the Scots, the dismounted English knights had closed their ranks up again as soon as the enemy heavy cavalry had broken through and so stopped the Scottish foot cold. Henry of Huntingdon, instead of turning his remaining cavalry and hitting the wavering English in the rear, led his knights against the Anglo-Norman mounted reserve, chasing off the horses of the dismounted knights, but letting his small force be destroyed in the process.
Here is a prime example of the early knightly code of fighting a “worthy opponent” when one was available, rather than choosing the militarily sound alternative in order to win the battle.
At this point, the battle was still anyone’s to win.
As Prince Henry’s knights fought and died, an Englishmen picked up a head from the bloody ground and proclaimed it to be King David’s.
A groan went up from the Scottish ranks as the rumour spread, forcing David to ride out to the front and show himself to his men.
It was then, Henry of Huntingdon tells us, that “the chief of the [Galwegians] fell, pierced by an arrow, and all his followers were put to flight.”
Actually, both Donald and Ulgerich had been killed, causing the Galwegians to flee the field.
At this point, David, seeing the Galwegians streaming from the field, ordered his reserves into action.
He even dismounted to lead the attack on foot, but this did nothing to rally the faltering Scottish morale—the rout of the Galwegians spread to the other clans and contingents.
As the Highlanders watched their allies flee past them, they turned and joined in the retreat.
The king then drew his remaining forces and bodyguard together and fell back to the hill from whence they had started the battle less than an hour before.
He managed to rally enough of his men around his banner to dissuade the English from attacking his strong position.
After another hour or two of purposeful combat, King David, fearing his son was dead, began to withdraw his remaining men back toward Scotland.
The jubilant English praised God and proceeded to hunt down wounded and straggling Scots.
The battle was a bitter loss for the Scots.
Contemporary estimates put the casualties at 10,000 to 12,000 Scottish dead, certainly a hugely inflated number, however a more realistic estimate would be 1,500 Galwegians, and 1,500 to 3,000 others killed or captured.
English losses were perhaps 500 to 1,000 in total.
The Scottish retreat from the battle was not without its own drama—the Lowlanders and Highlanders fought against each other as they fled the field, each accusing the other of being traitors and cowards.
Of the heavy cavalry, the Scots counted a total of 19 left with Prince Henry, miraculously escaping the English thanks to his dispersal of the English horses.
The Prince and his surviving men mingled with the English until they could make their escape and re-join King David three days later.
As with many battles of the medieval period, the results were not what one would expect.
In 1139, the Treaty of Durham found King Stephen ceding Northumbria to David and recognising the sovereign rights of Scotland, the point being to settle the political situation in the north.
He had his hands full with Matilda’s growing support in England during a period that would become known as The Anarchy, which gives some idea of its severity and effect on the psyche of the chroniclers of the time.
King David outlived his son Prince Henry by a year, dying peaceably 15 years after the Battle of the Standard.
King Stephen died a year later, in 1154, leaving the throne of England to Matilda’s eldest son, King Henry II.
-
The most significant event of the Scottish Norwegian wars of the 13th century. The Norwegian army was led by King Haakon, and the Scots by Alexander III.
Kintyre and the Western Isles had been acknowledged as the property of the Norwegian crown in a treaty between Edgar, King of Scots and Magnus Barefoot, King of Norway, in 1098.
By the mid-12th Century the Norwegians appeared uninterested in their Scottish lands, and by 1156 Somerled, descended from Dalriada royalty, had become their lands’ ‘sub-king’ and son-in-law of Olaf, King of Man.
In 1263, Alexander III made an offer to Haakon IV to buy Kintyre and the Isles back. Haakon rejected his offer and instead, hearing of Scots attacks on Skye, set sail with a fleet to do battle with Alexander.
When news reached Haakon that the Scottish King was planning to seize his territorial possessions, he set off with a mighty fleet of ships and joined forces with King Dougal of the Hebrides and King Magnus III of Man.
Sailing via the Hebrides to collect additional men and ships, the fleet eventually numbered some two hundred ships.
Ewan MacDougall was now on the Isles.
Trying to remain neutral, he refused to join Haakon but surrendered the islands to him.
With his men hungry to pillage, Haakon sent part of the fleet to Bute and Loch Lomond, which was reached by dragging fifty galleys across the land at Tarbet. the main fleet was sailed past Alexander’s position at Ayr and anchored off Largs.
On the 30 September a gale struck the area, wrecking and sinking the galleys.
A sea battle began which lasted for four confused days.
When the gale subsided on the 5 October Haakon withdrew and headed for the Isles.
Ewan had, by this time, decided which horse to back, and attacked the remaining Norse fleet.
Having raided the coastline, however, Haakon moved south to the Firth of Clyde on the West Ayrshire coast where he was attacked by a large Scottish force, estimated at around 8,000 men.
Although claimed as a Scottish victory, the ensuing skirmish simply culminated in both sides retreating.
Winter was approaching, and Haakon sailed to Orkney, planning to return in the following year, but he fell ill and died on 15th December.
Two years later, King Alexander successfully invaded the Hebrides and negotiated with Haakon's successor, King Magnus.
Under the Treaty of Perth in 1266, Scottish sovereignty was purchased in return for 4000 marks and an annual payment of 100 marks in perpetuity.
-
The Battle of Kinghorn was fought on 6 August 1332 at Wester Kinghorn (now Burntisland), Fife, Scotland.
A Scottish army, possibly 4,000 strong, commanded by Duncan, Earl of Fife, and Robert Bruce, Lord of Liddesdale (an illegitimate son of King Robert the Bruce) was heavily defeated by an invading seaborne force of 1,500 men commanded by Edward Balliol and Henry Beaumont, Earl of Buchan.
Balliol was the son of King John Balliol and was attempting to make good his claim to be the rightful King of Scotland.
He had 1,500 men with him and was hoping that many of the Scots would come over to him.
Balliol's force was small, only 1,500 men: 500 men-at-arms and 1,000 longbowmen.
He anticipated being joined by large numbers of Scots once he had landed.
While they were underway, the Scots selected Donald, Earl of Mar, as the new guardian, and divided their large army:
Mar commanded the part north of the Firth of Forth, while Patrick, Earl of March, commanded those to the south.
Balliol had been in communication with Mar and hoped that he would come over to him, with many of his troops.
Knowing Mar to be commanding the troops on the northern shore of the firth, Balliol landed there, at Wester Kinghorn (present day Burntisland), on 6 August 1332.
While the invaders were still disembarKing they were confronted by a large Scottish force commanded by Duncan, Earl of Fife and Robert Bruce, Lord of Liddesdale (an illegitimate son of King Robert the Bruce) with a force of around 4000, although some suggest 10,000, 14,000 and even 24,000.
Scottish sources imply that the force was much smaller based on the presence of both Fife and Bruce, that 4,000 "is probably the closest to the truth"
The Scots attacked the part of the English force on the beach, but were driven off after a hard-pressed assault by the fire of English longbowmen and by their supporting infantry, before Balliol and Beaumont's men-at-arms could get ashore.
Scottish accounts of the time dismiss their losses as trivial, while one English source gives 90 Scots killed, two give 900, and a fourth 1,000.
One chronicle, reports that Fife was "full of shame" at being defeated by such a small force.
Five or six nobles were among the dead, including Sir Alexander Seton. There is no record of the casualties suffered by Balliol's men.
Buoyed by this victory, Balliol and Beaumont's force completed their disembarkation and marched to Dunfermline, where they looted a Scottish armoury.
Mar withdrew to the capital, Perth, amalgamated the survivors of Kinghorn and sent out a general call for reinforcements.
On 11 August Balliol's force met Mar's army at the Battle of Dupplin Moor, where the Scots vastly outnumbered the invaders; by ten to one according to Rogers' estimate.
Despite this the Scots suffered a serious defeat, with thousands killed, including much of the nobility.
Balliol was crowned King of Scotland at Scone – the traditional place of coronation for Scottish monarchs – on 24 September
Balliol's support within Scotland was limited and within six months it had collapsed.
He was ambushed by supporters of David II at the Battle of Annan a few months after his coronation.
Balliol fled to England half-dressed and riding bareback. He appealed to Edward III for assistance.
Edward supported him, inflicted a defeat on the Scots at the Battle of Halidon Hill in July 1333 and put Balliol back on the Scottish throne.
Balliol was deposed again in 1334, restored again in 1335 and finally deposed in 1336, by those loyal to David II.
1296 to 17th March 1328 —
The first wars of Independence
The First War of Scottish Independence began when King John Balliol of Scotland refused to support King Edward I of England in his French campaign.
Hostilities came to an end after thirty two years with the signing of the Treaty of Northampton in 1328.
-
When King John Balliol of Scotland refused to support King Edward I of England in his French campaign, Edward marched an army on Scotland.
After capturing Berwick-upon-Tweed, he lingered for a time before marching on Dunbar.
The Scots occupied the high ground but as the English broke ranks to cross a gully, they abandoned their position assuming that the enemy was dispersing.
The result was that the Scots were decimated in a single charge, then a large numbers of Scottish noblemen were subsequently taken prisoner and either executed or pardoned.
The Calvinists were in support of Charles II when he became King and signed both the Covenants in 1649. Cromwell, however, was not.
With sixteen thousand men he invaded Scotland in July and headed for Edinburgh, expecting to rendezvous with his supply ships at Leith.
David Leslie and the Scots army did not let him.
By August Cromwell had backtracked to Dunbar.
As the Scots followed, Covenanting ministers dismissed from among them any who did not meet their godly standards.
Least satisfactory were the professional soldiers, most of whom were told to leave, and Leslie’s force dropped by five thousand, leaving what was described by an appalled officer as ‘an army of clerks and ministers’ sons’.
Even so, by September Cromwell’s men were pushed up against the sea at Dunbar with no sign of their supplies, and with their premium position on Doune Hill above, the Scots had only to wait for the already weak enemy to surrender.
Patience was not among the fervent ministers’ virtues.
Ignoring Leslie and knowing nothing of military tactics, they sent his twenty thousand men down the hill.
It was the consummate military blunder.
Three thousand were killed and ten thousand captured.
Edinburgh Castle belonged to Cromwell by December.
The aftermath of the 1650 Battle of Dunbar saw the grave mistreatment of 5,000 Scottish prisoners-of-war at the hands of the English Parliamentarian army.
These battle-weary prisoners were starved of food and sleep, whilst at the same time force-marched over 100 miles to a makeshift prison in hellish conditions.
Yet this is one of the least known stories of the civil war that raged across the whole of Britain, probably not surprising as it leaves such a black mark on England’s military history.
Scot Clans was contacted by a relative of one of the handful survivors of this terrible event which has led us to research the so named ‘Death March to Durham’.
-
There is a local tradition that William Wallace and his guerrilla forces won a significant victory over the English on the outskirts of the Lanarkshire town of Biggar.
The Battle of Biggar, which Somerville states was fought in May 1297 between Sir William Wallace, according to Blind Harry, but not by any other historian.
He says it was fought on marshy ground, and the traditional battle site is a low-lying field SE of Biggar, where pieces of broken armour have often been found, however New Statistical Account, states that the English encampment, and battlefield lay east of Biggar, in the areas called Back Well Park, Stanehead,
It is understood the battle was to avenge the death Wallaces’ wife, Marion Braidfoot, who had been miserably killed by William Heselrig, the English Sheriff of Lanark.
The Battle of Biggar is is recorded in Blind Harry’s renowned poem, “Ye Actis and Deidis of ye illuster and vaikeand Campioun, Shyr Wilham Wallace, Knycht off Elriale,’ and the abridgment by Hamilton of GilbertfielcL
According to minstrel Blind Harry, in 1297, Sir William Wallace, to revenge the murder of his wife, attacked the garrison of Lanark under cloud of night, and by fire and sword put almost every one of the English who composed it to death.
This notable exploit soon resounded over the country, and brought together a large number of men who were desirous of striking a blow for the freedom of their country. Wallace was unanimously chosen their leader.
The English garrisons who had been left to keep the country in subjection, were of course much alarmed by these warlike demonstrations, and Aymer de Vallance, then dwelling at Bothwell, despatched a courier with intelligence of them to Edward.
The Kings plan for the total control of Scotland, using diplomacy, as well as military intervention, was thwarted.
He was enraged at the news of this “atrocity”, and instantly set about to mass his army to march again into Scotland and avenge the insolence and audacity of the Scots, seeking to crush them under even more stringent control.
The Queen vainly tried to persuade him against this retaliation.
She argued that the injustice he was looking to force on Scotland, by removing its ancient sovereign power, and reducing Scots to slavery.
Undeterred, the King despatched his heralds over the country to summon his vassals to meet him in war and to follow him to Scotland.
One of Edward’s pursuivants, by birth a Scotsman, and well known in Scotland afterwards by the name of Jop, on learning the intentions of the English King, left the court and hastened to Scotland to give information of them to Wallace, whom he found in Ayrshire.
Wallace lost no time in setting up his standard at Lanark, and sending notice to his friends, especially in Ayrshire and Clydesdale, to join him without delay.
Adam Wallace, the young laird of Richardtown, Sir Robert Boyd, the ancestor of the Earls of Kilmarnock and Errol, Sir John Graham, Sir John Tinto of Ciympcramp, Sir Thomas Sommerville of Linton and Carnwath, Sir Walter Newbigging of Newbigging, near Biggar, Nichol Auchinleck, and other men of note, hastened with their followers to obey the summons.
On mustering their united forces, they were found to amount to 8000 horsemen, well equipped, and a considerable number of foot but these were in a great measure destitute of arms.
The Scots, learning that Edward was approaching with a powerful and well-appointed army, and being aware that they could not cope with him in the open field, took themselves to a strong position on the hill of Tinto, about four miles from the town of Biggar.
The English army marched up the Tweed from Berwick, and after winding among the hills of Peeblesshire, descended on the plains of the Upper Ward of Lanarkshire, by the ancient pass of Orosscryne.
The Scots, from their elevated encampment, no doubt beheld this ‘awful oet,' as the Minstrel calls it, defile over the mountain's below.
It amounted to 60,000 warriors, clad in complete armour, led 'on by the most warlike and politic monarch of the age, and supplied with everything that could contribute to their comfort, or inspire them with confidence and courage.
Still the little patriotic band on the side of Tinto manifested no symptoms of fear, nor thought for a moment of dispersing themselves and providing for their safety. The English pitched their camp near Biggar, on a piece of ground rising gently from the valley traversed by Biggar Water, and having a deep and inaccessible morass on the south and east.
From this place Edward despatched two heralds to Wallace, commanding him to submit to his authority, and. promising if he should do so to take him into his service and favour, and to confer upon him the amplest rewards; but in case of disobedience, he threatened to hang him the first time he should fall into his hands.
Wallace, after consulting his friends, wrote back to the King that he rejected his offers with disdain; and that, so far from being intimidated by his threats, he was determined to contend against him until he was driven from the Kingdom; that the Scots would sacrifice him without mercy should he ever become their prisoner; and that they would be prepared to offer him battle at no distant period.
A young knight, the King’s nephew, either out of curiosity, or for the purpose of ascertaining the numbers and reconnoitring the position of the Scots, had accompanied the heralds in disguise; but Jop recognising this youth, having often seen him before while living at the English court, gave intimation of his rank and condition to Wallace.
In these chivalrous times, it was considered highly dishonourable for a true knight to act as a spy, or for any-one to assume the character of a herald who did not belong to that order; and the person who did so was held to have forfeited all claim to be treated with mercy.
The Scots, smarting under the wrongs inflicted on them by the English, indignant at the haughty and imperious message sent by the King, and especially enraged at the duplicity of the young warrior and his companions, instantly resolved to punish them in a most severe and summary manner.
The knight was conducted to an eminence above the camp, and had his head struck from his body; the tongue of one of the heralds was cut out, and the eyes of the other extracted with a pair of pincers.
The two heralds, in this dreadful plight, were ordered to return to the English camp with the head of the knight, and to inform the King that he might regard what the Scots had done as a proof that his threats and his powerful army had not been able to strike them with terror, or bring them to submission.
When Edward learned what had taken place, he was for some time struck dumb with sorrow and indignation; and at length, when his feelings were somewhat tranquillized, he vowed not to leave Scotland till he had taken the amplest vengeance on Wallace and the Scots for the outrage they had perpetrated.
Wallace had now resolved to take a very daring step.
He was quite well aware that his small army was no match for Edward's in a fair field, and that his only chance of success lay in some well-concerted and vigorously-executed stratagem.
To carry out such an object, he was convinced that it would be of great advantage were he to visit the English camp in disguise, and thus ascertain its means of defence, and the positions occupied by the King and his generals.
He communicated his design only to Sir John Tinto, and enjoined him to observe the strictest secrecy.
He accordingly disguised himself, and left the camp unnoticed. On his way between Coulter and Biggar, he met a poor man driving a horse laden with pitchers of earthenware.
Wallace entered into conversation with him, and finding him to be an itinerant merchant, instantly entertained the idea that he might gain admission into the interior of the English camp by pretending to be a hawker of earthenware.
He accordingly purchased the man’s horse and his stock in trade; and still thinKing his disguise not sufficiently complete, proposed an exchange of garments—a proposal which greatly increased the man’s astonishment, but to which he readily assented.
Equipped in the hawker’s habiliments, consisting of a threadbare hood, a grey doublet, and hose daubed, or, as Harry says, ‘claggit’ with clay, closing one of his eyes as if it had been deprived of vision, and driving the mare, he set forward, to the great amusement of the old hawkter, towards the town of Biggar.
In this guise, tradition says that he passed along the old narrow bridge which crosses Biggar Burn; and that from this circumstance, as we have already stated, it first got the name of the ‘Cadger's Brig,' which it still retains.
About twilight he entered the English camp, and while seemingly intent on the sale of his commodities, he was, at the same time, carefully observing the arrangement of the encampment,
‘Quhar lords lay and had yair lugyng maid,
Ze Kings palzone quharon ye libards baid,
Spyand full fast quhar aw&ill suld be,
And couth weyll luk and wynk with ye ta e.’
The soldiers, no doubt struck with his singular appearance, soon began to treat him with considerable freedom.
Some of them broke his pots, while others indulged in jokes upon his blind eye.
It is a tradition, that one man declared that if the hawker had not been blind of an eye and lame of a leg, he was certain that he was Wallace himself.
This declaration was afterwards put into rhyme, and is still well known at Biggar. It is as follows:—
'Had ye not been cripple o’ a leg, and blind o’ an ee,
Ye are as like William Wallace as ever I did see.'
Wallace finding his situation becoming perilous, made haste to retire without exciting further suspicion.
He returned to his own camp just in time to save the life of his friend, Sir John Tinto.
A great discontent had arisen among the Scots when it was known that Wallace had secretly left the camp, as it was conjectured that he had, after all, deserted his friends, and might betray them to the enemy.
As he had been last seen in communication with Sir John Tinto, that knight was called on to disclose what he knew regarding the movements of their leader; but as he positively refused to do this, he was put under restraint, and a cry was raised that he should forfeit his life for his obstinacy.
When the excitement was at the very height, and Tinto was expecting nothing else than that he would fall a victim to the general indignation, Wallace made his appearance, ordered him to be set at liberty, and commended him highly for his unflinching fidelity to his obligation.
The chiefs gathered round Wallace to hear an account of his adventures, the recital of which afforded them much amusement; but it called forth a strong expression of dissatisfaction from Sir John Graham, who maintained that such conduct was un-chieftain-like, and altogether unbecoming the commander of an army.
Wallace, in reply, said that before Scotland was free, it would be necessary for them all to subject themselves to far greater hazards, and to perform still more daring exploits.
The Scottish army retired to rest, but with instructions that every man should be on foot before daybreak, and ready for the march.
When the trumpet, at the appointed time, blew a rallying blast, they all sprang up, ready armed, and eager for the fray.
They were immediately drawn up in three divisions.
The first was led by Wallace himself, and under him were Sir Robert Boyd and Nicol Auchinleck; the second by Sir John Graham, and under him were Adam Wallace, younger of Riccarton, and Sir Thomas Sommerville of Carnwath; and the third by Sir Walter of Newbigging, and under him were Sir John Tinto, and David, son of Sir Walter.
The foot, being badly armed, were drawn up in the rear, and received orders not to engage rashly, but reserve themselves till a fitting opportunity, or till they were properly supplied with arms.
Wallace then summoned the chieftains around him, and strictly enjoined them to prevent their followers from being allured from the combat by the pillage which the English camp might present.
He reminded them, that those who betook themselves to plunder before the victory was gained, generally lost both their life and their booty.
He expressed the utmost confidence that they would, on this occasion, strike a blow worthy of freemen, and exert themselves with all their might to inflict punishment on a false tyrant who had come to put fresh chains on the necks of their countrymen.
All of them readily consented to attend to his orders.
They had scarcely commenced their march, when, through the feint gloom of the summer's morning, they beheld a body of armed men approaching from the south, which naturally filled diem with alarm.
These, however, turned out to be a party of three hundred hardy and stalwart borderers, under the command of Thomas Halliday and his two sons, Wallace and Rutherford; and with them also came Jardine of Applegirth, and Rodger Kirkpatrick, Lord of Torthorald; the whole being on their way to join the Scottish patriots who had taken up arms in defence of their country.
This welcome increase of strength was hailed with great satisfaction, and still further raised the spirits of the Scots.
The combined force now proceeded at great speed towards Biggar.
The English, to prevent surprise during the night, had posted pickets at some distance from their camp; but as dawn began to appear, these had been withdrawn.
The English, being aware of the comparatively small number of the Scots, entertained no suspicion that an attack would be made upon them by day.
When the first division of the Scottish horsemen, led on by Wallace himself, therefore, rushed upon them, they were taken somewhat by surprise.
The knowledge which Wallace had acquired by his visit to the English camp, was of the greatest use, as he knew the ground, the disposition of the tents, and the best mode of conducting the assault.
He therefore rushed with his division into the very heart of the camp, with the view of reaching the tent of the King; but he found this was impossible, as the English soldiers in great numbers rallied round it, particularly the Earl of Kent, with a detachment of 5000 men.
The Scots, finding themselves encumbered with their horses, dismounted, and carried on the affray on foot.
As they were all stalwart men, expert in war, and animated with a deadly resentment to the English, they fought with the most desperate valour, and created havoc among their terrified, without order, and half-armed antagonists.
Graham and Newbigging, with their divisions, followed by the foot, who had now obtained an abundant supply of weapons, also hastily pushed forward, overturning the tents in their way, and slaughtering every opponent they could reach.
The battle still raged round the King's personell with great obstinacy; and the Scots, having joined their forces* began to drive the English' back towards the valley, covered with deep marshes on the south, and in the confusion the royal tent was overturned.
The Earl of Kent,' proud of displaying his martial skill and prowess in the presence of his sovereign, rallied his troops once and again; and, with a ponderous battle-axe, committed great havoc among the Scots.
Wallace, seeing his victory thwarted by the powerful arm of this intrepid and fearsome warrior, sought him out amid the throng, and engaged him in single combat
When these two distinguished champions had fairly encountered, the surrounding warriors, on both sides, almost suspended their fighting to watch this tremendous and heart-stirring one-on-one conflict.
Both fought with great fury, but with admirable courage and dexterity, till, at length, Wallace, with an irresistible stroke, smote him lifeless to the ground.
At this sight the English were discouraged, and mounting the King on horseback, forced him, much against his inclination, to quit the field.
In this encounter 4000 of the English were cut down, and the remainder, in terror and confusion, fled from Biggar, taking the direction of Coulter by the Causeway, which crossed the moss on the west
The Scots pursued them to Coulter Hope, about four miles away.
Here the English rallied in great force, and Wallace, knowing that he was no match for them in the open field, withdrew his followers to Biggar, after they had slain 7000 men in the pursuit, as no quarter was given.
Here, finding provisions and valuable commodities in abundance, and being exceedingly hungry and fatigued, they sat down to a sumptuous repast ; and after regaling themselves with bumpers of wine, proceeded to take some repose.
Their rest, however, was of short duration, as Wallace was afraid that the English, apprised of the smallness of their numbers, would return, prepared to die in order to recover their camp, so it seemed prudent to withdraw his forces to Davis Shaw which could provide strength and security - and to convey the booty obtained in the camp at Aesops’s Bog.
The English were now drawn up in Coulter Hope, on a place called John's Green, and were lamenting in the disaster and the loss of their comrades and commanders, among the latter of whom were the King’s son, his two uncles, and the Earl of Kent, when two cooks, who had concealed themselves in the camp, and skulked off after they saw the Scots indulging in repose, came and informed them that the Scots were lying in the camp, overcome with sleep and intoxication, and might easily be overpowered.
The King however was unwilling to concede this story, as he considered it unlikely that Wallace would be so remiss and unguarded in such circumstances.
He therefore decided to retreat, as there was little hope of recovering their provisions at Biggar, and no adequate supplies could be obtained amid the mountains by which they were surrounded.
The Duke of Lancaster urged, that the circumstances in which they were placed made it imperative that an effort must be made to regain the camp ; and though the King himself would not return, he requested to be furnished with a strong detachment, with which he hoped to recover the supplies, of which they would soon stand so much in need.
The King was pressured to take 10,000 men, and promised to wait on Lancaster till next day, expecting to be able to allow his troops conflict cruelty - as they might find among the hills.
The Governor of Calais and the Lord of Westmoreland resolved to accompany the Duke, and each of them obtained the command of 1000 men; Sir Aymer de Vallance also joined them with a considerable reinforcement.
These united parties marched back to Biggar, but found the camp plundered and deserted, and strewn with dead bodies that had been stripped bare.
For some time they were at a loss to conceive what place the Scots had retired to, but some scouts soon brought intelligence that they were posted at Davis Shaw, which is supposed to have been situated on the sloping sides of the hill of Bizzyberry, little more than a mile from Biggar.
They accordingly marched towards Biggar, but were seen by the Scottish sentries, who raised the alarm.
Leaving their horses in the Shaw, the Scots passed on foot into Hop's Bog, as a place of greater security from the attacks of the English division, which consisted principally of cavalry.
The 'English seeing them pass into the bog, and being that it was firm ground, rode towards them at great speed.
The consequence was, that the front line of horses were immediately bogged in the morass, and then trampled by those following.
In this state of mass confusion the soldiers were attacked by the Scots, and, being unable to free themselves from the bog, were slaughtered almost to a man.
The Scots, buoyed by this success, crossed the bog and fell on the remaining English, who were bewildered and intimidated by the fate of their comrades, and the boldness and success of their opponents.
The conflict, however, was sharp and long-continued, and great valour was displayed on both sides.
The mode of fighting at that time generally rendered a battle a series of single combats. Some notable encounters of this kind took place during the engagement.
The Governor of Calais, clad in complete armour, and expert in all warlike exercises, assailed Sir John Graham, who, with his trusty blade, warded off his attacks, and, at length, struck him such a blow as pierced his harness, and laid him lifeless on the spot.
Wallace, seeing Aymer de Vallance, one of Edward’s most active and resolute captains, and noted for his cruel oppression of the Scots, was anxious to engage with him; but the Earl of Westmoreland, coming between them, received a stroke from Wallace on his steel basinet, which killed him instantly.
Bobert Boyd encountered the Governor of Berwick, and, after an obstinate combat, also succeeded in slaying him by a ‘straik awk-wart ye crag,’ which cutting
'Throuch all hya weid in sondyr straik ye bane.’
The English, now panic-struck, left the field to the victorious Scots, and fled back to John’s Green.
Such was the Battle of Biggar; and if Harry is at all to be credited, it was productive of most important consequences.
Edward considered it prudent to return to England, without gaining the object of his expedition.
Many people of distinction quickly aligned themselves with Wallace, and, in a short time after, that undaunted and inflexible patriot was chosen Warden of Scotland, at an assembly of his countrymen held at Carluke Church, then called Forest Kirk.
The spot on which the English are supposed to have had their encampment, and on which the Battle of Biggar was fought, lies to the east of the town.
Farther east is the extensive bog, then called (Bop’s Bog,’ and now Biggar Moss).
A small stream, which runs out of this bog, is said to have been dyed with blood on the day of the battle, and, therefore, got the name of the 1 Red Syke,’ by which it is still known.
A little to the north is the hill of Bizzyberry, on which the wood called Davis Shaw is said to have been situated, on which evident traces of military conflict are still to be seen, and which has some parts of it associated with the name of Wallace to this day.
The story of the Battle of Biggar, as is well known, has been regarded by historians as a mere fable, and has brought down on the head of the poor Minstrel a perfect torrent of contempt and abuse.
The main cause of this is, that no historian or state document of the period mentions the expedition of Edward I. which ended in the Battle of Biggar.
It is stated, too, by some historians, and among others by HoLLnshed, that Edward was in France in 1297, the year in which Harry says the Battle of Biggar was fought.
Now, all these circumstances do not put the Battle beyond the bounds of probability. Documents of that period, whether written by statesmen or historians, were neither very detailed nor accurate, and were often, in the course of a few years, destroyed or lost.
Supposing Blind Harry's narrative to be correct, it is far from unlikely that the King was at pains, so far as he possibly could, to obliterate every trace of an expedition so disappointing to his hopes, and so damaging to his military reputation.
It is not a decisive statement to say that Edward was that same year in France, because he may have gone to that country shortly after the battle was fought; and even supposing that he was there the whole year, so the details given by Harry may be perfectly correct, although he may have made a mistake as to the exact date.
Several reasons might be assigned in favour of attaching credit to the Minstrel's story.
The causes which are said to have led to the battle, viz., the sanguinary proceedings at Lanark, do not rest on the testimony of Harry alone.
They are recorded by Fordun in his ‘Scotichronicon*’ and by Wyntoun in his 'Ckronykill of Scotland;' and are generally regarded as facts beyond dispute.
The slaughter of Hesi-rig, Thorn, and the English garrison at Lanark, and the gathering together of the Scots, under Wallace and other competent leaders, were certainly events sufficient to rouse Edward to make a fresh inroad into Scotland.
The complete subjugation of this country was regarded by that monarch as a matter of the last importance.
For the attainment of this object he had plotted and contended for years; he had held important national assemblies; he had overrun the greater part of Scotland; he had vanquished its armies.;' he had destroyed or carried off the memorials of its national independence.;, he had filled its strongholds with his troops; and he had foraed its King and its barons to submit to the most bitter mortifications, and to bend before him as their lord superior.
Though detachments of English troops were stationed in different parts of Scotland, it does not appear that there was at that time any concentrated force that oould effectually cope with the patriots who had banded themselves together^
In these circumstances, nothing was more likely than that Edward should again march into Scotland at the head of a large army.
The details given by Blind Harry are by no means improbable.
The visit of Wallace to the English camp cannot be a matter of great surprise, when we know that the Duke of Wellington, one of the most cautious of generals, was in the habit, both in Spain and France, of going alone, and in disguise, almost dose to the pickets of the enemy, to ascertain, with his own eyes, the nature of the ground, and the best modes of carrying out his movements.
-
Having been victorious at Dunbar a year earlier, Edward I's commanders John de Warenne, 7th Earl of Surrey, and Hugh de Cressingham, seriously underestimated the determination of the Scots to be free from English domination.
In early September 1297 a massive English army arrived in Stirling to destroy the Scots resistance to England’s rule.
The bridge at Stirling was only wide enough to allow two horsemen to cross side-by-side, and the Scottish leaders William Wallace and Sir Andrew Moray allowed the English army to cross the bridge, thus creating a bottleneck, before attacking.
"For this reason the Scots adopted a stout heart at the instigation of William Wallace, who taught them to fight, so that those whom the English nation held as living captives might be made renewed Scots in their own homeland,...
Hence in the year one thousand three hundred less three time one the Scots vanquished the English, whom they put into mourning for death, as the bridge bears witness, where the great battle is recorded, which lies beyond Stirling on the River Forth." Poem in Bower's Scotichronicon on the Battle of Stirling Bridge
Describing the battle, the English army under John de Warenne, Earl of Surrey, Govenor in Scotland for Edward I of England, marches north with a huge force of cavalry and infantry - confident of victory, whether by battle or negotiation.
Near Stirling Castle he arrives at a narrow, wooden bridge which crosses The River Forth, there, on the opposite bank is Wallace and Murray's army.
Warenne delays his crossing for several days to allow for negotiations, certain the Scots will choose peace over war in the light of recent English victories and their obvious military superiority.
He is surprised by their refusal to surrender and on the 11th September decides to force the crossing.
The Scots were encamped on the Abbey Craig, (where the National Wallace Monument stands today).
Their army was predominantly infantry armed with long spears, and was drawn mainly from the "lesser" ranks of society - not because the Scots nobles completely resisted Wallace, but because many of them were being held captive in England.
From the base of Abbey Craig a causeway stretched for a mile across The River Forth's flood plain.
At the end of the causeway stood the bridge which was wide enough to pass with only two horsemen abreast and the entire English army would have taken several hours to cross, after which they would have to enter a confined narrow loop in the river, leaving their flank dangerously exposed to attack.
All this before they were even ready to engage in battle.
At dawn the English and Welsh infantry start to cross only to be recalled due to the fact that their leader, Warenne, has overslept.
Again they cross the bridge and again they are recalled: as Warenne believes the Scots might finally negotiate.
Two Dominican friars are sent to Wallace to acquire his surrender and return shortly afterwards with William Wallace's first recorded speech: "Tell your commander that we are not here to make peace but to do battle, defend ourselves and liberate our Kingdom. Let them come on, and we shall prove this in their very beards."
Warenne decides to advance.
He is advised to send a cavalry force upstream to The Ford of Drip in order to cover the infantry's crossing, however Edward's treasurer, Hugh de Cressingham, intervenes, pointing out that too much of the King's money has already been wasted and insisting that they cross at once to bring the campaign to a swift end.
Wallace and Murray wait until more than half the English army has crossed the bridge before springing their trap.
The Scots spearmen rush down the causeway.
Those on the right flank force their way along the river bank to the north end of the bridge, cutting off any hope of escape.
Trapped in a confined space with the river to their backs the English heavy cavalry is virtually useless.
Only one group of English knights, under Sir Marmaduke Tweng, succeed in cutting their way back to the bridge.
After they have crossed, Warenne, who has wisely stayed put, has the bridge destroyed and flees to Berwick.
Over half the English army is left to its fate on the Scots side of the river.
Those that can swim do so, the rest (over 100 men-at-arms and 5,000 infantry) are inevitably massacred.
Many of them are Welsh, but among them is Hugh de Cressingham, Edward's hated tax collector, who had crossed first.
On the Scots side, Andrew Murray is fatally wounded - He dies two months later and is buried at Fortrose Cathedral on Black Isle, north of Inverness.
Victory brings the collapse of English occupation.
Wallace, now Guardian of Scotland, goes on to devastate the north of England in the hope of forcing Edward to acknowledge defeat.
Records show that 715 villages are burnt and many helpless people are no doubt slain.
The cycle of brutality, started by Edward at Berwick, rolls remorselessly on.
Until 1297 the heavily armed and mounted knight had been an invincible force on the battlefield.
Stirling Bridge was the first battle in Europe to see a common army of spearmen defeat a feudal host.
Stirling Bridge also destroyed the myth of English invincibility.
The Scots had not defeated a major English army since the Dark Ages, but this victory seems to have strengthened their will to resist Edward I.
However, the humiliation of losing to lowly Scots only strengthened Edward's determination: under a year later Wallace's Scots Army was defeated at The Battle of Falkirk.
-
Incensed by the news of his army's defeat at the Battle of Stirling Bridge, Edward I of England, who had been preoccupied fighting the French in Flanders, returned home to march on Scotland.
After various set-backs en route, Edward discovered that the Scots were at Callendar, close to Stirling, and seized the initiative.
It was the efficiency of the English longbows against the Scottish spear men which won the day, and it is estimated that over 2,000 Scots were killed.
Nevertheless, the English army which numbered almost twice that of the Scots force suffered a similar number of casualties.
With a large number of the survivors having deserted the cause, Sir William Wallace resigned as Guardian of Scotland.
The defeat of the English army at Stirling Bridge had enraged Edward and united the English nobility against the Scots.
In summer 1298, King Edward himself marched north at the head of a massive war machine.
Edward had over 1500 knights and mounted men-at-arms and more than 12,000 veteran foot soldiers. His army also brought a devastating new weapon - the English longbow - and a host of English and Welsh archers.
Edward’s journey north was not easy.
The Scots had undertaken a ‘scorched-earth’ policy; leaving nothing for Edward’s army to eat or drink.
Among Edward’s knights was Brian Le Jay, the former Templar Master in Scotland at Balantrodoch.
He was put in charge of restoring order after the Welsh threatened to mutiny and fought with English soldiers.
When Edward received word that the Scots were camped near Falkirk he led his army to face them.
The Scots were vastly outnumbered and lacked the heavy cavalry of the English.
On the morning of 22 July 1298 Wallace’s men formed four massive schiltrons and held their ground.
Between the schiltrons were Scots bowmen under Sir John Stewart of Jedburgh.
A small force of Scots knights under Sir John “Red” Comyn’ waited on horseback.
Wallace is famously said to have called out to his men, ‘I have brought you to the ring - now dance if you can.’
The Welsh refused to attack so Edward sent in two groups of mounted knights.
They wheeled around the schiltrons and charged but couldn’t break them.
Knights fell as their horses were impaled on Scots spears.
At that moment, when they should have joined the fight, the Scots nobles turned their horses and rode away from the battlefield.
The English knights turned on the Scots bowmen, cutting them down and killing their leader Sir John Stewart.
Edward recalled his cavalry and ordered his archers loose.
The English longbow was a new and deadly weapon; its iron-tipped arrows could pierce chainmail and padded armour.
Flight after flight of arrows rained down on the Scots and began to break the schiltrons.
Edward sent his knights to finish the Scots.
William Wallace managed to escape from the carnage.
The surviving Scots fled into the woods as Edward’s army hacked down the uprising. Edward watched the rout but his army was too hungry and badly supplied to continue the campaign.
The Templar Brian Le Jay fell at Falkirk, dragged from his horse and killed by Scots foot soldiers.
Among the Scots dead was Sir John de Graham, a close ally and friend of Wallace.
Wallace resigned as Guardian soon after the defeat at Falkirk.
-
On the 24 February 1303, the Scots army defied all the odds to defeat the English at the battle of Roslin. It ended as the bloodiest battle ever fought on British soil, but remains largely forgotten.
This was a victory against the occupying forces of Edward I of England and although of considerable significance, does not have the pre-eminence it surely deserves, possibly because it did not involve particularly large numbers.
In the aftermath of the Battle of Falkirk in 1298, Scotland was occupied by the English under the governance of Sir John de Segrave, a knight of Edward I.
Sir John had fallen in love with Lady Margaret Ramsey of Dalhousie.
But when he discovered that she had run off to marry Henry St Clair, Lord of Rosslyn, de Segrave was furious.
He responded by obtaining permission from Edward I to organise an invasion to eliminate St Clair, on the basis that the marriage with Lady Margaret would further cement ties between Scotland and France.
Sir John de Segrave’s forces arrived in the Scottish Borders in mid-February, and from here the Scots began to track their advance north.
De Segrave split his 30,000-strong army into three divisions, sending one group to attack Borthwick Castle near Gorebridge, the second group towards Lady Margaret’s Dalhousie Castle, and the third, led by Sir John himself, to Henry St Clair at Roslin.
The English force under Sir John Segrave was marching north from Northumberland, supposedly towards Linlithgow, when they were surprised by a contingent of Scots led by John Comyn and Simon Fraser beside Roslin Glen on the outskirts of Edinburgh.
On the eve of the battle John Comyn’s Scots army set up camp in the woods at Bilston to prepare themselves for attack.
The men launched their surprise offence under the cover of darkness the next morning and met with de Segrave’s forces as they slept by the River Esk.
It was a slaughter.
The English who fled were picked off by smaller groups of Scots positioned around the local area.
Comyn’s troops then laid siege to de Segrave’s second army holed up at Dalhousie Castle.
Sir Ralph de Confrey, leader of the second division ordered his men to march towards the summit of Langhill to meet the Scots, but his forces were decimated by Comyn’s archers and pikemen.
Again, the Scots spared no one.
Roslin witnessed a Scots force of 8,000 clash with an English army almost four times its size, and, astonishingly, the Scots emerged victorious.
It is estimated that 35,000 men lost their lives, which, if accurate, would make Roslin the bloodiest battle ever fought on British soil.
It was an overall victory for the Scots and it was said afterwards that the waters of the River North Esk ran red with blood.
Looking west towards the Pentland Hills, the Scots were roused by the sight of a huge canvas Saltire cross gleaming in the evening sun.
It had been laid by a group of Cistercian monks under the order of Prior Abernethy in a bid to spur the exhausted Scottish forces on for their final test with the third English division at Mountmarle above the Esk Valley.
As they charged from Borthwick Castle, the English, led by Sir Richard Neville, were ambushed and crushed by hordes of Scots located on the higher ground of the valley.
The long battle was finally won. It is thought that fewer than 2,000 English out of 30,000 survived.
The Scots’ knowledge and use of the Roslin terrain had proved crucial in delivering a decisive, but wholly-unexpected victory.
Defeated and heartbroken, de Segrave was captured and thrown in a dungeon with a hefty ransom on his head.
Lady Margaret’s new husband Sir Henry St Clair would later go on to sign the 1320 Declaration of Arbroath.
-
The Battle of Happrew was a skirmish which took place around 20 February 1304, during the First War of Scottish Independence.
Twelve months after defeat at Roslin, a strong English force under Sir John de Segrave, a chevauchée of English knights, which included Robert de Clifford, William de Latimer, and the later Scottish King, Robert the Bruce had been sent south from Dunfermline to locate and capture the rebels Sir William Wallace and Sir Simon Fraser.
At Happrew, just west of Peebles, they defeated Sir William Wallace and Sir Simon Fraser.
Fraser and Wallace escaped, however the following year, Wallace was captured at Robroyston, near Glasgow.
He was taken to London and executed.
A year later Fraser was beheaded after defeat in 1306 at Kirkincliffe.
-
Although implicated in the murder of his cousin John Comyn at the Church of the Greyfriars in Dumfries, Robert the Bruce was nevertheless inaugurated as King of Scots in the following month at Scone.
So far as Edward I of England was concerned, this was an outrage, and he appointed Aymer de Valence, Comyn's brother-in-law, to give no quarter to Bruce or his followers.
The Battle of Methven was part of the First War of Scottish Independence, fought on 19th June 1306 at Methven, west of Perth.
In Scotland, Robert the Bruce was already engaged in a full-scale civil war with the family and friends of John Comyn.
The coronation in March had given him some legitimacy; but overall the position was very uncertain.
His wife, Elizabeth de Burgh, the daughter of the Earl of Ulster, and now queen of Scots, is reported to have said 'It seems to me we are but a summer king and queen whom children crown in their sport'.
Aymer de Valence, the English general acting for Edward I, moved quickly, and by the middle of summer he had made his base at Perth, where he was joined by many of the supporters of John Comyn.
King Robert came from the west, ready to meet his foe in battle. He was prepared to observe on this occasion the gentlemanly conventions of feudal warfare, while the English adopted less orthodox tactics.
Valence was invited to leave the walls of Perth and join Bruce in battle, but he declined.
The Scottish forces were under the direct command of Robert the Bruce and are generally numbered around 4,500 strong although this figure is probably over-inflated.
Bruce's deputy at Methven was Christopher Seton with other notable commanders including Gilbert Hay and James Douglas.
The king, perhaps believing that Valence's refusal to accept his challenge was a sign of weakness, retired only a few miles to nearby Methven, where he made camp for the night.
Before dawn on 19 June, his little army was taken by surprise and almost destroyed, because Bruce had accepted Valence at his word and failed to take the precaution of placing pickets around the camp, his entire army was routed.
Bishops William de Lamberton of St Andrews and Robert Wishart of Glasgow were quickly seized and taken south, and incarcerated in an English dungeon, saved only from execution by their clerical orders.
Bruce barely escaped and fled with a few followers to the Scottish Highlands but after this he abandoned knightly chivalry and resorted to Wallace's more ruthless guerilla tactics.
-
Also known as Battle of Dalrigh or Strathfillan
Having gone on the run and retreating west from their defeat at Methven, King Robert's supporters were confronted near Tyndrum in Argyll by the MacDougalls of Argyll, who were related to the Comyn Family.
Tired and demoralised, the King's men who had survived the earlier battle were once again routed, but Bruce managed to escape.
On 19 June 1306 Bruce and his army were caught unprepared in their night camp at the Battle of Methven, west of Perth, by Aymer de Valence, an English general acting for Edward I.
What was left of his army retreated westwards, towards the mountains of Argyll.
When they reached Strathfillan they found their path blocked at Tyndrum by a large force of MacDougalls, said to have numbered 1,000 men, commanded by Alexander's son, John of Lorne, also known as John Bacach-'the Lame.'
Unable to retreat, Bruce's little army of 300 to 500, including women, the aged, etc. and a guard of Highland men, was forced into battle in disadvantageous circumstances in western Perthshire near the border with Argyll.
The site of the battle is known in Gaelic as Dail Righ-the King's Field-though it is uncertain if this was the name at the time or added afterwards by the chroniclers.
Locals have placed the battle at a number of local place-names (Lasantulich, Dalchaisnie, Inverchaddan, and names with Sasunnaich).
The only reporting we have for the Battle of Dalrigh are pro-Bruce, and tend to put a favourable interpretation upon the King's actions.
John Barbour has him 'boldly waiting' to engage John in battle, though 'his followers were all too few'.
However, Bruce's army had just been defeated and would have needed time to recoup; so it is possible that the MacDougalls took him by surprise.
Bruce's remaining horses were killed by the MacDougall axemen, who also wounded many of his men, including Sir James Douglas and Gilbert de la Hay.
Under considerable pressure Bruce did his best to disengage;
They thereupon withdrew.
In this there was no mark of cowardice.
They kept together; and the king
Was ever busy rescuing
The rearmost of his company.
With skill and valour there wrought he,
And safely all his men withdrew.
He daunted those that would pursue
So none durst leave their cloe array, For he was never far away.Bruce was so heavily involved in action with the rearguard that he found himself at one point alone and under attack between a hill and the loch-side, a pass so narrow that he could not turn his horse.
According to tradition, Bruce was so hard pressed that one of his assailants tore off the studded brooch that fastened his cloak.
Known as the "Brooch of Lorn" it was in possession of the Campbells until 1826 when it was turned over to the MacDougall family.
For the king to be placed in such a position, seemingly unsupported, provides some further evidence of the weakness of the royal forces.
The enemy was fought off and the army retreated to safety; but not long after it ceased to exist as an organised military force.
-
This was a minor skirmish, but nevertheless a victory for the Scots. King Robert had been a fugitive for several months, but in the spring of 1307 re-appeared in Galloway with a force of Highlanders.
After a raid on an English encampment on Clatteringshaws Loch, Aymer de Valence was advised that Bruce was to be found at the head of Glen Trool in today’s Galloway Forest Park.
He sent his cavalry commander John Mowbray off to capture him, but Mowbray's men were ambushed and driven back and Bruce and his men disappeared into the surrounding countryside.
The approach to Bruce’s camp would not have been easy.
Valence would have likely been approaching from the west along the southern shore of the loch, and the narrow track that he was following was bordered by a steep slope on his right, with Loch Trool to his left.
This forced Valence’s army, which contained mounted knights and men-at-arms, almost into a single file as they made their way towards the objective.
It is possible that the English horsemen dismounted for the final approach, as the terrain would not be suitable for the cavalry to effectively operate, however, an English account mentions the loss of several of horses in the engagement.
As Valence’s force reached the head of the loch, Bruce gave the order to attack, his men rolling boulders, hurling rocks and firing arrows down on the enemy before charging from their elevated positions up on the steep slopes, known locally as the ‘Steps of Trool’.
Bruce’s men charged into the centre of the English line, cutting the force in half. With little room to manoeuvre on the rough, broken ground, the English forces were unable to form, let alone maintain, any military formation and were cut down with heavy losses.
With this, Bruce had won a small but important victory, greatly boosting morale and gaining more support.
An account of the Battle of Glen Trool from John Barbour’s The Bruce:
“For all that time Sir Aymer lay in Carlisle with noble men in his company, awaiting his opportunity.
When he heard for certain that the king was in Glentrool and engaged in hunting and relaxing, he decided to come upon him then suddenly with his chivalry, riding from Carlisle by night, and keeping cover by day.
He intended that he would surprise the king in that way with that stratagem. He then assembled a great company of folk of very high reputation, both Scots and Englishmen.
Then they all held their way together, riding so secretly at night till they came to a wood near by Glentrool, where the king was lodged; he did not know of their arrival.
He is now in great danger, for, unless God by his great power saves him, he will be taken or killed; for they were six where he had one.
When Sir Aymer, who was stout and bold came, as I told you, so near the king that they were only a mile away from him, he took advice from his men as to what they should do next.
For he told them that the king was lodged in so narrow a place that horsemen couldn’t attack him, and if foot-men gave him battle, he would be hard to defeat if he were warned of their coming.
‘Therefore I advise, all secretly, that we send a woman, poorly clad, to spy on him’.
They thought this advice was for the best and sent forward without longer delay the woman who was to be their spy.
She held her way in haste, right to the lodging where the king, took courage from this good deed.
For some who had previously gone their way, came back quickly to the fight, meeting their foes so vigorously that all the foremost were driven back.
And when those behind saw that the frontline was leaving the field, they turned their backs and fled, withdrawing out of the wood.
The king killed a few of these men, for they got away very quickly.”
Following the Battle of Glen Trool, Aymer de Valence advanced again on Bruce’s position, with a force containing a large number of highlanders from Argyll that John MacDougall of Lorne (nephew of John ‘The Red’ Comyn) had sent.
Moving out from his base at Ayr, MacDougall himself was advancing from the north and both he and Valence were most likely aiming to trap Bruce between their armies.
Bruce saw the danger and withdrew over the hills, making his way towards Lothian before heading into Ayrshire.
The soldiers that were killed in the battle of Glen Trool are believed to be buried not far from the battle site in an area known as ‘Soldier’s Holm’.
To commemorate the battle a large boulder (a fitting tribute) was erected on the opposite side of the loch, overlooking the battle site and from where, according to legend, Bruce gave the signal to launch the attack.
-
10th May 1307
Following Glen Tool King Robert rallied his supporters and was back in business and again came up against his old adversary Aymer de Valence, now Earl of Pembroke, ten miles north of Kilmarnock in Ayrshire.
A more substantial victory in the field was needed now and this came on the 10th of May, at the Battle of Loudoun Hill
Bruce defeated the much larger English army - led by Valence, because the English soldiers were forced to approach the enemy over bogland, and rapidly fell victim to the spears of Bruce's men.
Over one hundred were killed before the remainder rapidly dispersed.
It would, however, be many years before his crown – and Scotland – was secure.
In 1307, the campaign against the English forces, as well as the Scots who were opposed to Bruce, was just beginning.
-
Sometimes known as the Battle of Barra
Despite Bruce being dangerously ill, in May 1308 his forces defeated John Comyn, the Earl of Buchan at the Battle of Inverurie.
King Robert became ill on his march north towards Aberdeenshire after his victory at Loudon Hill, but the spring of 1308 nevertheless found him and his army camped at Meldrum, close to Inverurie.
Bruce went eastwards into Buchan, capturing the Comyn castles of Banff, Balvenie and Duffus before besieging the Black Isle.
John Comyn, (3rd Earl of Buchan, was a cousin of the murdered John Comyn), Lord of Buchan, and determined to bring the King to justice.
However, he proved indecisive.
Many of his followers had been assured that the King was too ill to fight and when King Robert appeared before them, Buchan's men turned and fled.
Buchan himself escaped to England where he died the same year.
In what is known as the Herschip of Buchan (or the Harrying of Buchan), Bruce ordered the lands of Buchan to be destroyed – farms were burned, livestock slain and Comyn supporters murdered.
Most northern castles were ruined.
This was a conflict between King Robert I and the Macdougalls of Argyll, kinsmen of the murdered John Comyn.
It is generally understood that the Macdougalls were caught in a vice between King Robert and Sir James Douglas and put to flight.
-
This was a conflict between King Robert I and the Macdougalls of Argyll, kinsmen of the murdered John Comyn. There is variance as to exactly where (Brander or Ben Cruachan) and when the incident took place, but it is generally understood that the Macdougalls were caught in a vice between King Robert and Sir James Douglas and put to flight.
-
23/24th June 1314
This was the decisive victory of the Scots against the English in the First War of Scottish Independence and every Scot knows, who won the Battle of Bannockburn in 1314.
Although it did not bring outright victory in the war, which lay 14 years in the future and would only be won at the negotiating table.
While King Robert had largely succeeded in re-establishing the Kingdom of Scots, Stirling Castle still remained under English command and it was here that Edward II determined that he would confront the Scots once and for all.
With an army numbering 4,000 men he marched north, mustering his forces at Berwick and crossing the River Tweed at Coldstream.
The English army arrived at the Bannock Burn, just out of range of the canon shot of Stirling Castle, on midsummer's eve.
Prior to the battle, a young English knight, Henry de Bohun, a nephew of the Earl of Hertford, challenged King Robert to a duel and was struck to the ground by the King's axe.
Following the example set by Sir William Wallace, the King's army, which had been rallied from every corner of Scotland, was largely composed of spear men.
The size of the English army worked to its detriment, with its large numbers dispersing in confusion as the Scots emerged from the cover of the woods.
As the English formation broke, a great shout rang out from the Scots and victory was assured.
The victory was a combination of Bruce's demand of 1313: that all of the remaining Balliol supporters acknowledge his kingship or forfeit their estates, and the imminent surrender of the English garrison encircled in Stirling castle –spurring Edward II to invade Scotland.
He mobilised a massive military machine: summoning 2,000 horse and 25,000 infantry from England, Ireland and Wales.
Although probably only half the infantry turned up, it was by far the largest English army ever to invade Scotland.
The Scots common army numbered around 6000, with a small contingent on horseback.
It was divided into three "divisions" or schiltroms (massive spear formations), led by King Robert Bruce, his brother, Edward, and his nephew, Sir Thomas Randolph, Earl of Moray.
After eight years of successful guerrilla warfare and plundering the north of England for booty, the Scots had created an experienced battle-hardened army.
In June 1314, Edward II crossed the border only to find the road to Stirling blocked by the Scots army.
Bruce had carefully chosen his ground to the south of the castle, where the road ran through the New Park, a royal hunting park.
To his east lay the natural obstacles of the Bannock and Pelstream burns, along with soft, boggy ground.
It seems Bruce planned only to risk a defensive encounter, digging pots (small hidden pits designed to break up a cavalry charge) along the roadway, and keeping the Torwood behind him for easier withdrawal.
The battle opened with one of the most celebrated individual contests in Scottish history.
Sighting a group of Scots withdrawing into the wood, the English vanguard, made up of heavy cavalry, charged.
As they clashed with the Scots, an English knight, Sir Henry de Bohun, spotted Robert Bruce.
If de Bohun had killed or captured Bruce, he would have become a chivalric hero.
So, spurring his warhorse to the charge, he lowered his lance and bared down on the king.
Bruce, an experienced warrior, didn't panic, but mounted "ane palfray, litil and joly" and met the charge.
Dodging the lance, he brought his battle axe down on de Bohun's helmet, striking him dead. Elated, the Scots forced the English cavalry to withdraw.
Two of Edward's experienced commanders, Sir Henry Beaumont and Sir Robert Clifford, attempted to outflank the Scots and cut off their escape route – very nearly surprising the Scots.
At the last moment, however, Thomas Randolph's schiltrom dashed out of the wood and caught the English cavalry by surprise.
A ferocious melee ensued. Without archers the cavalry found they were unable to get through the dense thicket of Scots spearmen, even resorting to throwing their swords and maces at them, until the Scots pushed them back and forced them to withdraw.
The Scots had won the first day. Their morale was high and Bruce's new tactic of using the schiltroms offensively rather than statically, as Wallace had used them at Falkirk, appeared to be working.
Yet Bruce must have been contemplating a strategic withdrawal before the set piece battle that would inevitably follow in the morning.
For the English, the setbacks of the first day were disappointing.
Fearing Bruce might mount a night attack, they camped in the Carse of Balquhiderock.
The following day they still hoped to draw Bruce into a full-scale, set-piece battle where their decisive Welsh longbowmen could be brought to bear rather than let Bruce return to guerrilla warfare.
At this critical moment, Sir Alexander Seton, a Scots noble in the English army, defected to Bruce bringing him vital intelligence of Edward's army: its confined position and the low morale within the English camp.
Bruce decided to risk all in the morning and face Edward in open battle.
At dawn the Scots ate their breakfast and advanced out of the wood to face the enemy.
Medieval battles were seen as the judgement of God; it was important to have the saints on your side, and so, in the midst of the Scots schiltroms, Abbot Bernard of Arbroath carried their ancient lucky talisman, the Breccbennach (or Monymusk Relquary), which held the relics of St Columba.
Bruce himself made a speech invoking the power of St Andrew, John the Baptist and Thomas Beckett.
Then, according to the chronicler Walter Bower: "At these words, the hammered horns resounded, and the standards of war were spread out in the golden dawn."
Abbot Maurice of Inchaffrey walked out in front of the army, led mass and blessed the Scots as they knelt in prayer.
On seeing this, Edward II is reputed to have said: "Yon folk are kneeling to ask mercy." Sir Ingram de Umfraville, a Balliol supporter fighting for Edward, is said to have replied: "They ask for mercy, but not from you.
They ask God for mercy for their sins. I'll tell you something for a fact, that yon men will win all or die. None will flee for fear of death." "So be it", retorted Edward.
An archery duel followed, but the Scots schiltrom rapidly took the offensive in order to avoid its inevitable outcome. Edward Bruce's schiltrom advanced on the English vanguard, felling the Earl of Gloucester and Sir Robert Clifford, while Randolph's schiltrom closed up on their left.
The English knights now found themselves hemmed in between the Scots schiltroms and the mass of their own army and could bring few of their archers to bear.
Some broke out on the Scots flank and rained arrows into the Scots ranks, but they were quickly dispersed by Sir Robert Keith's Scots cavalry; the rest were badly deployed, their arrows falling into the backs of their own army.
In the centre of the field there was ferocious hand to hand combat between knights and spearmen as the battle hung in the balance.
At this crucial point Bruce committed his own schiltrom, which included the Gaelic warriors of the Highlands and Islands.
Under their fresh onslaught, the English began to give ground. The cry "On them! On them! They fail!", arose as the English were driven back into the burn.
The battle's momentum was obvious.
A reluctant Edward II was escorted away.
As his royal standard departed, panic set in.
The Scots schiltroms hacked their way into the disintegrating English army.
Those fleeing caused chaos in the massed infantry behind them.
In the rout that followed hundreds of men and horses were drowned in the burn desperately trying to escape.
The battle was over.
English casualties were heavy: thousands of infantry, a 100 knights and one earl lay dead on the field.
Some escaped the confusion: the Earl of Pembroke and his Welsh infantry made it safely to Carlisle, but many more, including many knights and the Earl of Hereford, were captured as they fled through the south of Scotland.
Edward II with 500 knights was pursued by Sir James "The Black" Douglas until they reached Dunbar and the safety of a ship home.
The capture of Edward would have meant instant English recognition of the Scots demands. As it was, they could absorb such a defeat and continue the war.
For the Scots it was a resounding victory.
Bruce was left in total military control of Scotland, enabling him to transfer his campaign to the north of England.
Politically he had won Scotland's defacto independence and consolidated his Kingship – as former supporters of Balliol quickly changed sides.
In exchange for Bruce's noble captives Edward was forced to release Bruce's wife, daughter and the formidable Bishop Wishart, who had been held in English captivity since 1306.
For the Scots soldiers there was the wealth of booty left in the English baggage train and the exhilaration of victory.
-
14th October 1322
After their great victory at Bannockburn, the Scots regularly raided into England without resistance.
Taking advantage of the prospect of a civil war in England, King Robert encouraged his commanders Sir James Douglas, Thomas Randolph, 1st Earl of Moray and Walter Stewart to mount a foray into the North East while King Edward II was preoccupied with bringing his rebel barons to heel.
At first, the Scots incursion was largely ignored but when Edward had finally suppressed his close-at-hand opponents at the Battle of Boroughbridge, he determined to retaliate on Scotland and invaded.
King Robert immediately adopted a scorched earth policy, retreating north across the Firth of Forth.
Edward, his troops ravished by hunger, succeeded in reaching Edinburgh and destroyed Holyrood Abbey.
Meanwhile, the Scots army had moved in a circular movement to the south west, crossing the Solway Firth into England and, turning east, intercepted the homecoming English army in North Yorkshire.
The subsequent confrontation turned into a rout with Edward's commander, John de Bretagne, 1st Duke of Richmond, taken prisoner.
Edward himself was forced to make a rapid escape from Rievaulx Abbey.
-
It had always been King Robert's desire to take part in a Crusade as a form of penance for the murder of his cousin John Comyn in 1306.
It was therefore his dying wish that his embalmed heart be taken on such a mission by his good friends Sir James “The Good” Douglas; Sir William St Clair and his brother, John St Clair; Sir William Borthwick; Sir Simon Lockhard of the Lee; Sir William Keith; Sir Robert Logan of Restalrig, and Sir Walter Logan.
In the spring of 1330, therefore, a party of Scottish knights and esquires set off to mainland Europe with the heart and a letter of recommendation from the King of England to King Alfonso XI of Castile who was at the time embroiled in a war against Muhammed XI, Sultan of Granada.
Arriving in Seville at the end of July, the group were welcomed and at once seconded to the Castello de la Estrella, which was being occupied by the Sultan's forces. It was perhaps a headstrong but excusable misunderstanding.
The Moors were assembled beneath the castle walls and, assuming that King Alphonso's army was behind him, Sir James led a charge into the midst of enemy.
He was immediately surrounded and killed, calling out as he threw the silver casket containing King Robert's heart ahead of him: "Now pass thou onward before us, as thou wast wont, and I will follow thee or die."
Ironically, the Castilians won the day, but only two of the Scottish knights, Keith and Lockhart, survived.
The bodies of Sir James and the other fallen knights were returned to Scotland along with the heart of King Robert in its silver casket.
It was soon afterwards interred at Melrose Abbey.
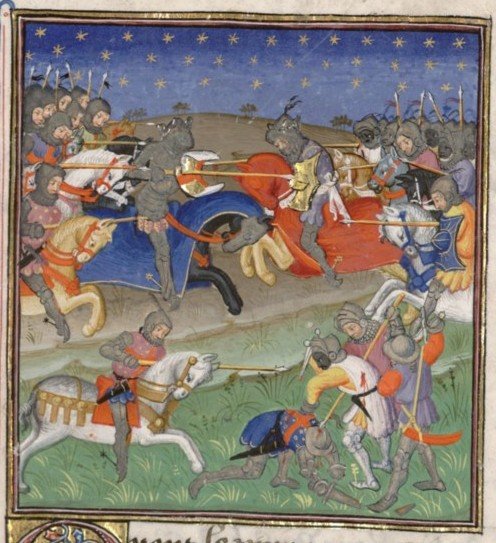
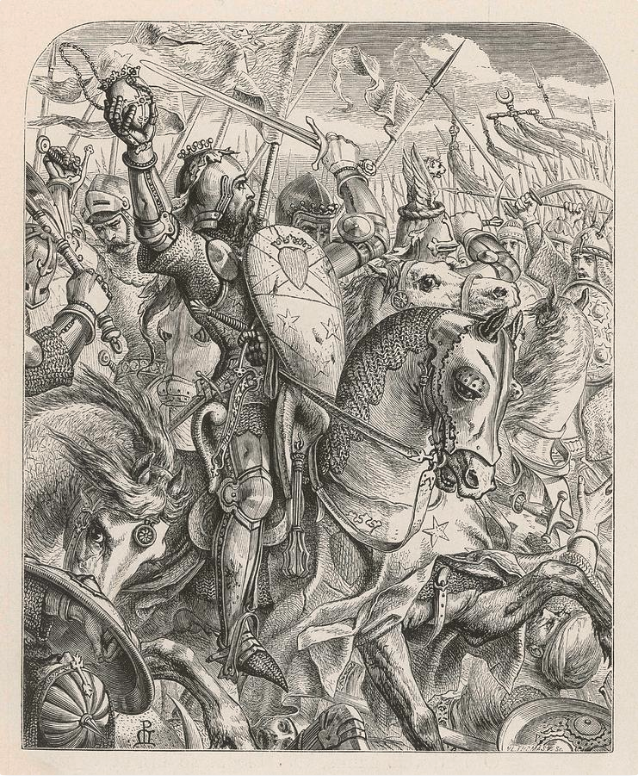
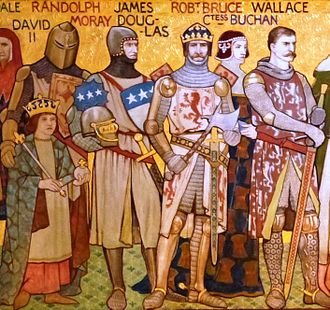

Battle of Neville's Cross. Painted by the Froissart of Louis of Gruuthuse, c. 1470
The Second War of Scottish Independence
1332 to 3rd October 1357 The Second War of Scottish Independence began with the invasion of Edward Balliol, son of the exiled King John, and a party of the “Disinherited”, whose lands had been confiscated after King Robert I's victory at Bannockburn.
The hostilities officially ended twenty five years later with the signing of the Treaty of Berwick in 1357.
-
12th August 1332
King Robert I's death in 1329 revived the claim of the House of Balliol to the Scots throne.
The recently crowned David II, was only four years old, which created a vulnerable situation not helped by the sudden death of his Guardian, Thomas Randolph, 1st Earl of Moray.
The following year, David was married at the age of five to Princess Joanna, sister of Edward III of England, which should have alleviated the situation, but it appears not.
Landing at Kinghorn in Fife, Edward Balliol and his followers, backed by the English King, reached Forteviot where they were challenged by an army led by Donald, Earl of Mar, who had succeeded Moray as Regent.
A second force led by Patrick, Earl of Dunbar was approaching from the south, but Mar, rather too confident in his strength of numbers, was lax in his watch which allowed the enemy led by Sir Alexander Mowbray to cross the River Tay and make an initial attack.
The subsequent arrow fire from the English ranks caused havoc. and both Mar and Lord Robert Bruce, the natural son of the late King Robert, were killed.
A few weeks after his victory, Edward Balliol was crowned King of Scots, but with the general hostility shown towards his faction across Scotland, moved his power base to Galloway.
-
17th December 1332
Four months after his victory at Dupplin Moor, King Edward Balliol and his supporters were surprised and attacked as they slept at Annan, in Dumfriesshire, and forced to flee over the Border into England. The victors, who were loyal to David II, were led by Sir Archibald Douglas, brother of Sir James “The Good” who had died at Teba in Spain in 1330. Also involved were John Randolph, 3rd Earl of Moray, Simon Fraser, and King Robert I's grandson, Robert, High Steward of Scotland.
-
19th July 1333
Driven out of Scotland by supporters of David II, Edward Balliol appealed to Edward III of England for assistance. Despite King David being his brother-in-law, Edward dropped all pretence of neutrality and decided to invade Scotland on Balliol's behalf. Berwick-upon-Tweed was put under siege and at Halidon Hill, north west of the town, Edward's army confronted the Scots under Sir Archibald Douglas. From the beginning, the English archers wrought havoc on the advancing Scots. Among the Scots dead were Douglas, the earls of Ross, Sutherland and Carrick, seventy barons and five hundred knights.
Edward III did little to press home his advantage, but his success at Halidon Hill was seen by many as avenging his father's defeat at Bannockburn.
-
30th November 1335
Scotland was divided between the Balliol and the Bruce factions, and in May 1334, the ten-year old King David and Queen Joan were sent to France where they were placed under the protection of Philip VI. At the same time, the 3rd Earl of Moray and Robert, High Steward, became Guardians of the Kingdom.
The unrest continued, and following a relatively successful skirmish in August 1335, a loyalist army under Sir Andrew Murray defeated David, Earl of Atholl and other supporters of Edward Balliol at Culblean (Kilblain), close to Kildrummy Castle in Aberdeenshire.
-
17th October 1346
It was the Auld Alliance with France that drew Scotland into conflict once again with England.
By 1346, it had become apparent that Edward III was intent on continuing what would become known thereafter as The Hundred Years War with France, and the unprepared French King Philip VI appealed to the King of Scots for help.
Having enjoyed Philip's hospitality for most of his childhood, the twenty-two-year old David II was unlikely to refuse.
Believing the English army to be preoccupied with the Siege of Calais, a Scots invasion of England took place in October with the Scots army taking up a position in Durham.
The English, however, were prepared and an army from Cumberland, Northumberland and Lancashire had been mobilised by the Archbishop of York.
King David took up a position at Neville's Cross, the site of an ancient Anglo Saxon stone, and the battle commenced with neither side making any progress until the English longbowmen arrived.
When it became clear that the battle was lost, Robert the Steward and the Earl of March retreated allowing the King to be captured.
Among the dead was the former Regent, the 3rd Earl of Moray.
King David spent the next eleven years of his life as a prisoner in London.
In 1357, following a treaty signed at Berwick-upon-Tweed, King David was released on the promise of a ransom of 100,000 merks.
He returned to Scotland at once, but soon discovered that he was unable to meet the ransom demands.
Queen Joan died in 1362, and although David married again, this time to Margaret Drummond, there was no children from either union.
He died at Edinburgh Castle in 1371 and was succeeded by his half-uncle who became Robert II.
Swathes of Southern Scotland remained under the control of English forces, so he allowed his nobles licence to attempt to regain their territories.
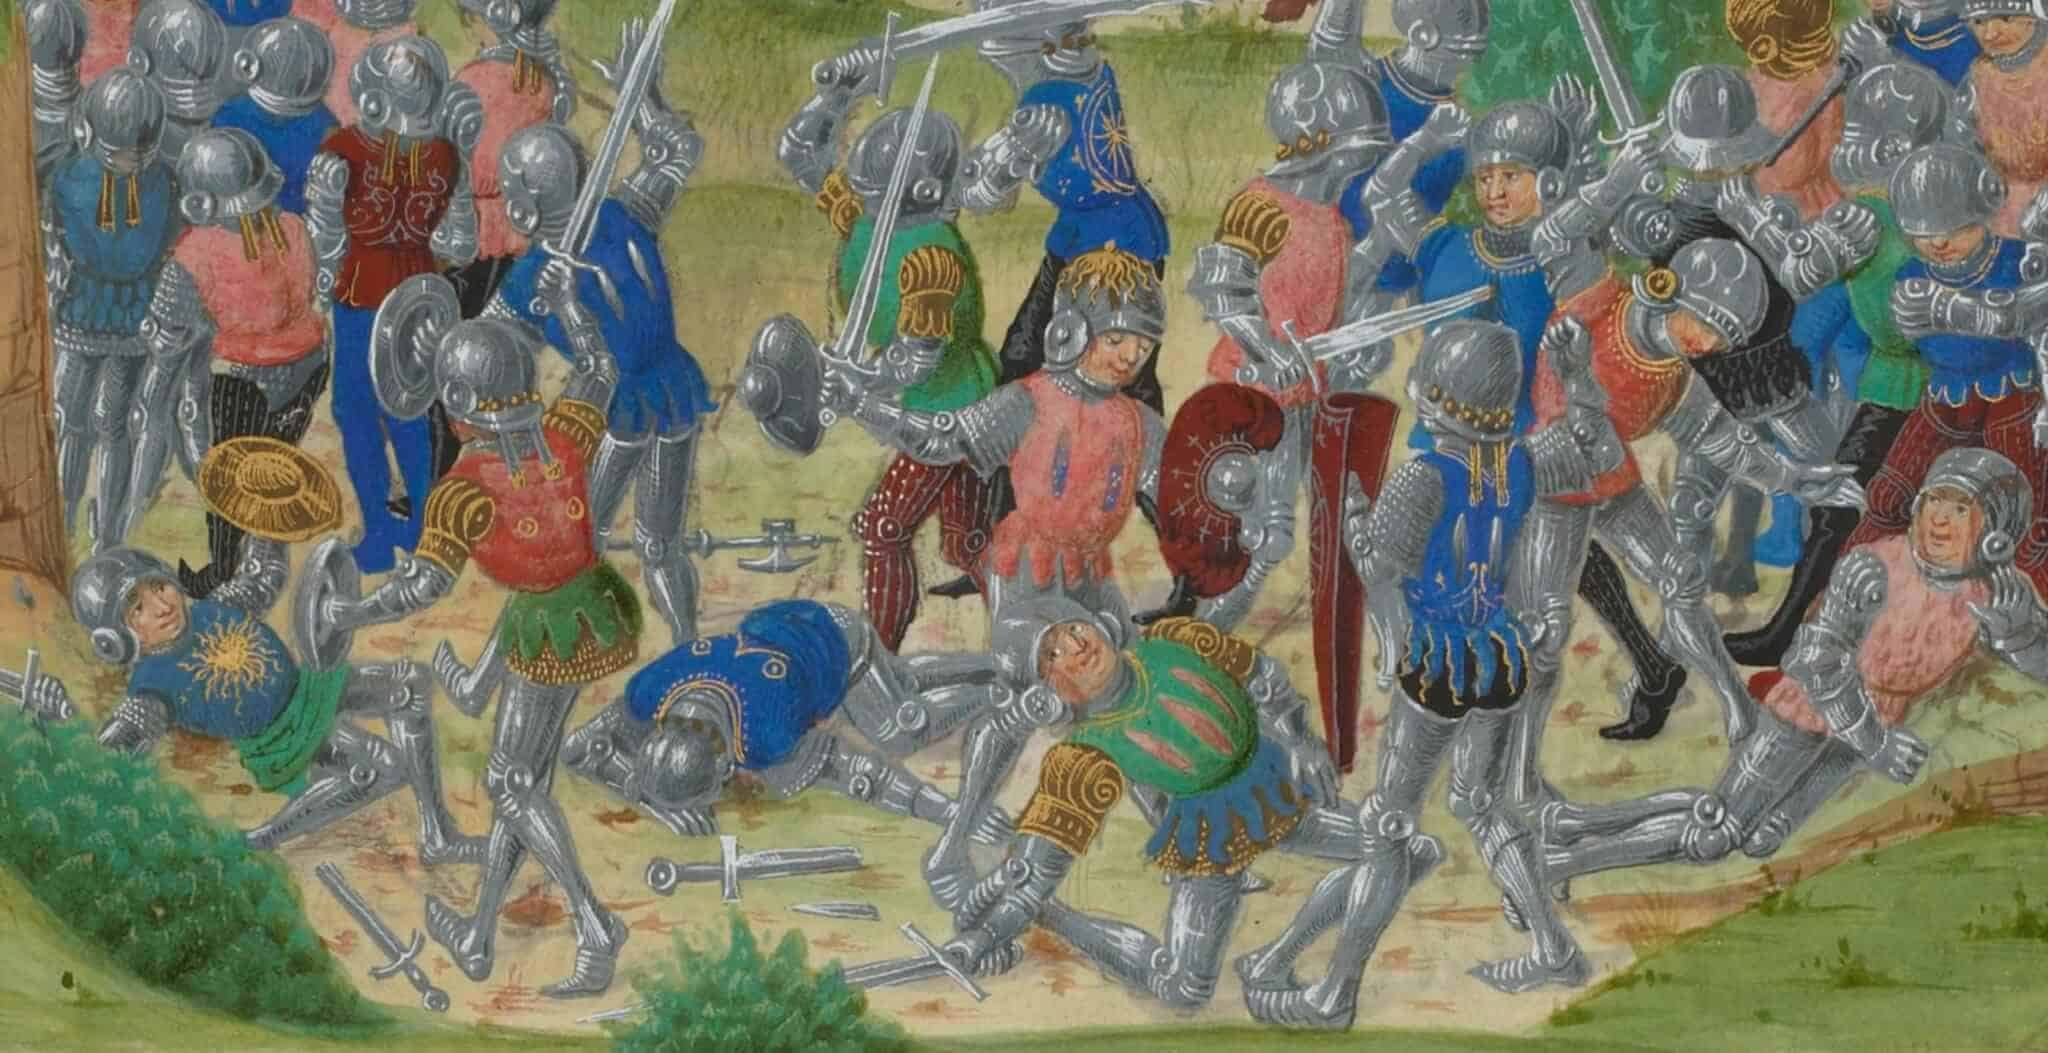
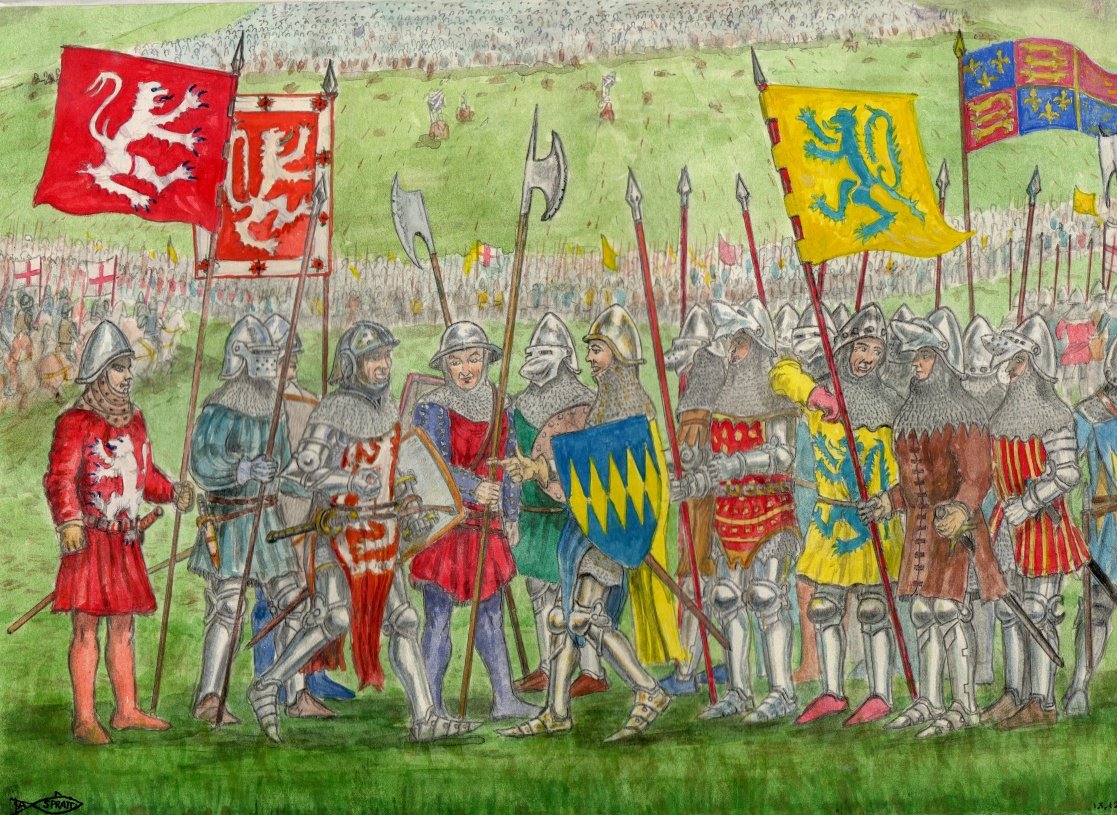
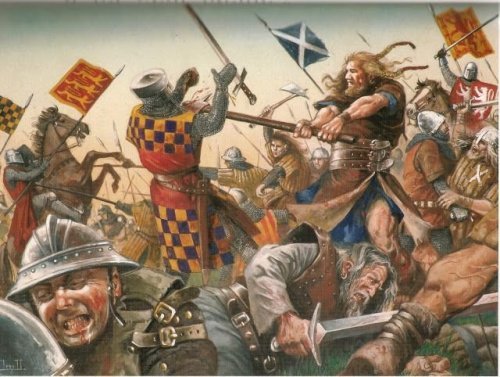
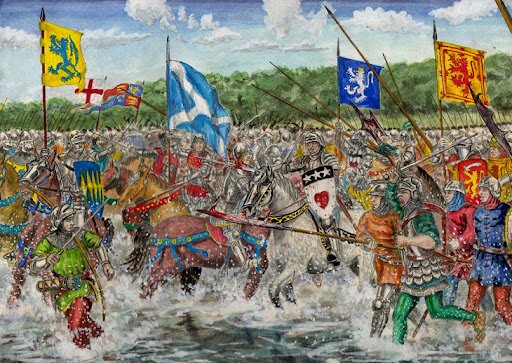
-
25th June 1380
With William, 1st Earl of Douglas, invading the West March of England, the Scots under George, Earl of Dunbar & March, defeated a force of 200 English near St Boswells led by Ralph, 3rd Baron
Greystoke who was on his way to take possession of Roxburgh Castle. Greystoke was imprisoned in Dunbar Castle and later ransomed.
-
5th August 1388
On a moonlit night in Northumberland, the Scots army under James, 2nd Earl of Douglas defeated an 800 strong English contingent under Henry Percy (“Hotspur”), son of the 1st Earl of Northumberland.
To some extent both armies were taken by surprise; the English assuming the Scots were some distance ahead of them when they came across them setting up camp.
Douglas was killed in the hand- to-hand fighting, but the Scots fought on unaware of the fate of their leader until the English dispersed.
Hotspur was taken prisoner and later ransomed.
-
28th September 1396
Although the details are subject to much speculation and reinterpretation, this was a planned dual between the Clan Chattan Federation (which comprised clans Mackintosh, Macpherson, MacBean, Davidson, MacGillivrays and Shaws) and Clan Kay, which some historians believe to have been Clan Cameron, traditional enemies of Clan Chattan.
For some time, King Robert III had been attempting to persuade the two warring factions to settle their differences amicably and, through the mediation of the 1st Earl of Crawford, it was agreed that a contest would take place.
The Chiefs agreed and, in front of a large number of spectators including the King, met on the banks of the River Tay at Perth.
Evenly matched, thanks to the last minute recruitment of Henry Smith, a local armourer, a violent conflict took place on the North Inch with Clan Chattan emerging victorious.
-
22nd June 1402
Two years earlier there had been an English incursion into Scotland led by the traitorous George, 1st Earl of Dunbar and Henry “Hotspur” Percy.
This had left many Border towns and villages in flames until Archibald, 4th Earl of Douglas, husband of King Robert III's daughter Margaret, had chased the perpetrators off.
The Scots retaliated with a series of raids over the Border and looting Carlisle. However, following one such foray a contingent of 400 Scots was confronted and defeated at Nisbet in Berwickshire by Dunbar and a large force of English soldiers.
-
14th September 1402
This was the outcome of yet another pillaging foray by the Scots into England led by the 4th Earl of Douglas.
On this occasion they were intercepted and overwhelmed on their return by an army led by Hotspur and Henry Percy, 1st Earl of Northumberland, himself.
Douglas was among the prisoners.
-
24th July 1411
Essentially this was a clan battle fought near Inverurie in Aberdeenshire between the Gaels of the West Coast and the Highlanders of the East Coast.
When the Duke of Albany, acting as Regent in Scotland, annexed the earldom of Ross, Donald, Lord of the Isles, marched on Ross with 10,000 followers.
Having captured Dingwall Castle, he turned towards Aberdeen where he was opposed by Alexander Stewart, Earl of Mar.
A bloodbath followed with Donald retreating back to the Western Isles and there were heavy losses on both sides.
-
22nd July 1415
A force of 4,000 Scots invaded northern England while King Henry V was preoccupied at the Battle of Agincourt in northern France.
They were decisively defeated on the edge of the Cheviot Hills by 440 men led by Ralph Neville, 1st Earl of Westmorland.
-
This historic confrontation not only marked a significant turning point in the protracted conflict known as the Hundred Years' War between England and France but also underscored the unparalleled bravery of Scottish warriors fighting on foreign soil.
Among these brave hearts was a member of the Buchanan family, Sir Alexander Buchanan, whose singular act of heroism at Bauge has become a source of immense pride and a celebrated part of Buchanan lore to this day.
The Prelude to BattleIn the turbulent early years of the 15th century, the English crown, under the ambitious Henry V, embarked on a campaign of conquest in France that saw them capturing key territories and fortresses with an army that was considered invincible by many. In a desperate bid to stem the English advance, Charles VII of France reached out to his allies for support, seeking the prowess of Scottish arms, renowned for their tenacity and martial skill.
The Scottish response was formidable, a force of 10,000 men-at-arms led by the stalwart Earl of Buchan. Among these warriors was Sir Alexander Buchanan, a figure destined to carve his name into the very heart of this historic battle.
The Battle UnfoldsThe Battle of Bauge unfolded on the banks of the River Couesnon, in a scenario that initially seemed to favor the English, buoyed by their recent string of victories. The Scots, however, had the element of surprise firmly on their side, a strategic advantage they did not squander. Launching into the fray with a vigor that caught the English unawares, the Scottish force made it clear that they were a force to be reckoned with. In the thick of this chaos, Sir Alexander Buchanan emerged as a beacon of courage and determination. Spotting the Duke of Clarence, a key English commander and brother to Henry V, Buchanan seized the moment. With a combination of sheer bravery, martial prowess, and perhaps a touch of fate, Buchanan engaged the Duke in combat. The encounter was fierce, but Buchanan's resolve was fiercer, culminating in the defeat of the Duke, a moment that significantly shifted the tide of battle in favor of the Franco-Scottish alliance.
The repercussions of the Battle of Bauge reverberated far beyond the battlefield, serving as a symbolic and strategic blow against English ambitions in France.
The victory, with Sir Alexander Buchanan's defeat of the Duke of Clarence at its heart, was more than a military triumph; it was a statement of the unwavering bravery and skill of Scottish warriors. Buchanan's heroic deed earned him not just the admiration of his peers but tangible recognition in the form of a golden coronet, a symbol of honor that he later sold, embedding his act of valor in the annals of history and legend alike.
This battle rejuvenated the French in their struggle against English dominion and cemented the Auld Alliance between Scotland and France. For the Buchanan family, this event was a shining moment that highlighted their commitment to the principles of bravery, honor, and the enduring legacy of the Scottish warrior tradition.
ConclusionThe Battle of Bauge stands as a testament to the unpredictable nature of warfare and the profound impact that individual acts of heroism can have on the outcome of battles and the course of history. Sir Alexander Buchanan's remarkable feat is not just a story of courage in the face of overwhelming odds; it is a beacon of inspiration that illuminates the values of bravery, sacrifice, and the relentless pursuit of justice.
As we reflect on the pages of history, we are reminded of the Buchanans' enduring contribution to Scotland's storied past and the timeless lessons of valor that continue to inspire generations.
Adapted From: Buchanan, A. W. P. (1911). The Buchanan book: The life of Alexander Buchanan, Q.C., of Montreal, followed by an account of the family of Buchanan. Printed for private circulation. Bagtown Clans -
June 1429
When James I returned to Scotland from captivity in England in 1424, he determined to bring his northern Kingdom under his direct control.
Alexander, 3rd Lord of the Isles, was equally determined to assert his rights, in particular his claim to the earldom of Ross.
He therefore marched his Highland army up the Great Glen and burned the town of Inverness as a challenge.
On his return journey, however, the King's supporters caught up with him near Fort William. In the ensuing battle it appears that various clans such as the Camerons and the Mackintoshes changed sides, and Alexander fled to the islands.
He later surrendered to James in Edinburgh and following a period of imprisonment in Tantallon Castle was allowed to go free.
-
Dunbar Castle had been forfeited to the Scottish Crown by the 11th Earl of March and, with the assistance of the 2nd Earl of Northumberland, he made an attempt to win it back from its occupant, William, 2nd Earl of Angus, Warden of the Scottish Marches.
Angus received warning of this and intercepted the English army at Cockburnspath in Berwickshire, taking a large number of prisoners.
-
23rd January 1446
This was a local dispute fuelled by the dismissal of Alexander Lindsay, son of the 3rd Earl of Crawford, Chief Justiciar of the Abbey of Arbroath, and the appointment of Alexander Ogilvy of Inverquharity in his place.
Lindsay furious and with 1,000 of his men took possession of the town and abbey.
A battle took place and the Ogilvys, supported by Sir Alexander Seton of Gordon, were heavily defeated.
-
23rd October 1448
The Battle of Sark (or the Battle of Lochmaben Stone) was the first decisive Scots victory over the English for fifty years.
When the 2nd Earl of Northumberland led a force into Dumfriesshire, he was decisively defeated at Lochmaben by Hugh Douglas, Earl of Ormonde (son of the 7th Earl of Douglas), George Douglas, 4th Earl of Angus, and William St Clair, 1st Earl of Orkney.
-
18th May 1452
A feud between Clan Ogilvy and Clan Lindsay had been ongoing for some time, and yet another confrontation took place at Brechin where the 4th Earl of Crawford, the Lindsay Chief, was defeated by the Ogilvys in an alliance with Clan Gordon, led by Alexander, 1st Earl of Huntly.
-
This clan battle was fought between Clan Munro and Clan Mackintosh on the banks of the Beauly Firth near Inverness.
It was caused by a dispute over the amount of “blackmail”, or toll money the Munros were expected to pay for crossing Mackintosh land with their cattle.
There are varying accounts of what ensued, but it is generally thought that the Mackintosh chief was killed in the struggle. A monument marks the site of the battle.
-
1st May 1455
This was an incident in the ongoing conflict between the Royal House of Stewart and the Black Douglases who were considered a threat to the governance of James II.
There were, in fact, two Douglas factions: the Black Douglases under the rebellious James, 9th Earl of Douglas, and the Red Douglases, represented by the earls of Angus, and who supported the King.
The fight took place near Langholm in Dumfriesshire. Douglas remained in exile in England, but his brothers Archibald, Earl of Moray and Hugh, Earl of Ormonde were captured and executed.
Afterwards, the Black Douglases objectives were achieved.
-
3rd August 1460
Roxburgh Castle, which had been fought over on many occasions by the Scots and the English, had fallen to the English and was destroyed after 19-year old James II was killed by one of his own cannons exploding next to him.
Queen Mary (of Gueldres) raced to the scene with their son, now James III, to encourage the Scots who were under the command of George, 4th Earl of Angus, and the castle capitulated.
-
This was considered an epic confrontation at Wick between Clan Gunn from Caithness against Clan Keith and Clan Mackay from Strathnaver.
A dispute appears to have arisen over land claimed by Clan Gunn's allies, the Oliphants,
The Keiths won, but it appears that James IV later granted the lands to the Oliphants.
-
22nd July 1484
James III was not the most popular King of Scots, and exploiting the situation, his cousins Alexander Stewart, Duke of Albany and James, 9th Earl of Douglas brought a troop of English cavalry into Scotland with the backing of the recently crowned Richard III.
They misjudged the situation and when they turned up at the annual Lochmaben Fair in the hope of inciting an uprising, the townsfolk turned against them.
Albany escaped while Douglas was taken prisoner and imprisoned at Lindores Abbey where he died four years later.
-
11th June 1488
A civil war had sprung up around the unpopularity of James III who was confronted by a group of dissident Scottish nobles, supposedly led by his 15-year old son, the future James IV.
The battle which took place near Stirling went badly for the King, who was thrown from his horse.
His death happened shortly afterwards, but there is no hard evidence to support any of the various reports.
-
11th October 1489
In the aftermath of Sauchieburn, there was considerable unrest among the Scots nobility and near Aberfoyle, the recently crowned James IV had to repel a force led by Matthew, 4th Earl of Lennox and the 1st Lord Lyle.
Lennox fled to England, while Lyle was later pardoned and restored to his office of Great Justiciary of Scotland.
-
Circa 1488/89
James IV of Scotland was particularly interested in ships and canon, and determined that Scotland's defences should be state-of-the- art.
Scottish waters were often harassed by privateers sent north by Henry VII of England, and on one such occasion five of them were pursued and attacked by Sir Andrew Wood off the coast of Dunbar.
The two Scots ships, Flower and Yellow Caravel won the day and the English ships were taken hostage.
The following year, Edward VII sent his most able commander Captain Stephen Bull north to capture Wood.
On 10th August 1489, Bull surprised Wood, but the latter succeeded in capturing all three of the enemy vessels, taking them to Dundee.
9th September 1513 Battle of Flodden (also known as the Battle of Branxton Moor)
With Henry VIII of England's invasion of France in support of the Holy League, James IV of Scotland was compelled through the terms of the Auld Alliance to invade England to cause a diversion.
The English forces were led by Thomas Howard, Earl of Surrey (later 3rd Duke of Norfolk).
James had placed his canon on a hill, but Surrey's forces had mistakenly continued north and, turning around to approach from another direction, rendered the Scots fire power largely useless.
The battle took place in Northumberland, and was the worst military disaster in Scotland's history with the King and virtually the entire nobility of Scotland being killed on the battlefield.
-
There have been many bloody feuds and battles in Scottish history - but only one began with a salmon to the face
According to oral history the feud began at a fair in Kilmahog, near Callander, in Perthshire; specifically at the foot of the Pass of Leny.
One of the visitors to the fair was a member of the MacLaren Clan who was considered to be dim-witted. As he was strolling through the fair he came in contact with one of the Buchanans who, in jest, slapped his face with the tail of a salmon knocking his hat off his head.
Insulted by this act, the MacLaren man dared the Buchanan to do it again at the fair in Balquhidder, home of the MacLarens.
But forgot to inform his fellow members of the challenge.
On the day of the fair in Balquhidder, the MacLarens were busy buying and selling and socializing among their kin, unaware that the Buchanans had mustered a group and were heading to meet up with them.
The MacLarens became aware of the group as they approached Ruskachan, Strathyre, but were unaware of their intention. As the group of Buchanans got closer, the dim-witted man recalled what happened at Kilmahog.
He informed his clan members about the incident and the MacLarens rushed to gather their forces. A fiery cross, indicating that they were under attack, was sent around MacLaren country letting the clan members know they needed to prepare and assemble at Balquhidder.
The majority of MacLarens had not arrived in time for the initial Buchanan attack. The Buchanans had the upper hand pushing the MacLarens back over a mile into their territory to a clergy house located near the Old Parish Church in Balquhidder. At that location the MacLarens were able to turn the battle around after the Chief of the MacLarens saw one of his sons cut down and killed.
Suddenly seized with battle madness, he yelled out the clan slogan “Craig An Tuirc” and grabbing his claymore he furiously rushed the Buchanans. His clansmen, joined by other local friends and neighbours, followed him and in a frenzy began cutting down the Buchanans.
Only two Buchanans escaped the slaughter by jumping into the Balvaig River at a deep pool called Linn nan Seicachan. However, both men were pursued . The first man was caught and killed at Gartnafuaran and the final Buchanan was tracked down and killed at Sron Lainie. The incident was forever known as the circumstance at Sron Lainie due to the location of the death of the final Buchanan.
-
9th September 1513 – Scotland invades England and England wins…
With Henry VIII of England's invasion of France in support of the Holy League, James IV of Scotland was compelled through the terms of the Auld Alliance to invade England to cause a diversion.
The English forces were led by Thomas Howard, Earl of Surrey (later 3rd Duke of Norfolk).
After besieging and capturing several English border castles, James encamped his invading army on a commanding hilltop position at Flodden, Northumberland, and awaited the English with a cannon pointing South.
But Surrey's forces had mistakenly continued north and, turning around to approach from the rear, rendering the Scots fire-power and strategy largely useless.
The battle began with an artillery duel followed by a downhill advance by Scottish infantry armed with pikes. But unknown to the Scots, the bottom of the hill (to the North) was very marshy, which broke up their formations. The English chose a more familiar weapon, the bill, which favoured the terrain and the flow of the battle.
The battle was the worst military disaster in Scotland's history with the King and virtually the entire nobility of Scotland being killed on the battlefield.
James IV was the last monarch from Scotland to die in battle; and the loss of a large proportion of the nobility led to a political crisis in Scotland.
Some use the Battle of Flodden to mark the end of the Middle Ages in the British Isles…
-
24th July 1526
The young James VI was being held under the so-called protection of his step-father Archibald, 6th Earl of Angus and various members of the Scottish nobility, and Sir Walter Scott of Buccleuch was determined to free him.
The King was being escorted from Jedburgh to Edinburgh when Buccleuch attacked the party at what was to become known as Skirmish Hill at Melrose.
Buccleuch was injured in the fighting and, with heavy losses, obliged to retreat.
-
4th September 1526
This was yet another attempt to release the 14-year old James VI from the custody of his step-father Archibald, 6th Earl of Angus.
Having fallen out with Angus, who had become her second husband, the Queen Dowager Margaret, enlisted John Stewart, 3rd Earl of Lennox to her cause.
Lennox raised an army to march on Edinburgh but was intercepted and his men dispersed at Linlithgow by James Hamilton, 1st Earl of Arran
-
24th August 1542
When Henry VIII of England broke with the Church of Rome, he wanted his nephew, James V of Scotland, to follow his example.
But when James refused to meet him at York to discuss this, Henry sent an army north to assert his rights as Over Lord.
When an English army led by Robert Bowes, Warden of the East Marches, invaded, they were met by the Scots under George Gordon, 4th Earl of Huntly, near Kelso and soundly defeated.
-
24th November 1542
James V, anxious to assert his advantages after Haddon Rig, mustered a Scots army to retaliate on England, but was met by Sir Thomas Wharton and 3,000 men at Solway Moss.
It was not so much a battle as a capitulation. James, who was ill from a fever at the time was at Lochmaben Castle, and withdrew to Falkland Palace in Fife.
Within two weeks he had died at the age of thirty leaving only an infant daughter to become Queen of Scots.
-
15th July 1544
James V had imprisoned John of Moidart, 8th Captain of Clanranald and a dispute arose over who should take over the Clanranald Chiefship.
A claim was made by Ranald Gallda, son of the 4th Captain of Clanranald.
His mother was a Fraser, and when John of Moidart was released, Ranald took refuge with the Frasers of Lovat.
Clan Donald supported by Clan Cameron then raided Fraser lands but were checked by George, 4th Earl of Huntly.
The two sides met again at Kinlochbervie where Hugh Fraser, 4th Lord Lovat, the Master of Lovat, and Ranald Gallda were killed in battle.
Tradition has it that in the intense heat of that summer day, the Highlanders discarded their armour and fought in their shirts.
-
27th February 1545
Towards the end of his life, Henry VIII of England became increasingly determined that his son Prince Edward should marry the infant Mary Queen of Scots, and thus the two Kingdoms embarked upon the period which became known as “The Rough Wooing.”
Under the command of Edward Seymour, Earl of Hertford, a substantial English army was sent north in 1544 to force the Scots to comply, and succeeded in burning Edinburgh and much of southern Scotland.
The following year, the combined forces of James Hamilton, 1st Earl of Arran and Archibald, 6th Earl of Angus took the English army led by Sir Brian Layton by surprise and scattered them, taking over 1,000 soldiers prisoner.
-
10th September 1547
After Henry VIII's death, Edward Seymour, Earl of Hertford, was appointed Duke of Somerset and Protector of the Kingdom, and continued to press for a marriage between the ten-year old Edward VI and the five-year old Mary Queen of Scots.
Somerset advanced his army into Inveresk, near Edinburgh, and was met by the Scots under the command the 1st Earl of Arran, the 6th Earl of Angus, and 4th Earl of Huntly.
It is estimated that over 5,000 Scots were killed, and as a result the infant Queen Mary was rapidly smuggled out of the country and sent to France where she was betrothed to the Dauphin, son and heir to the French King Henry II.
-
18th April 1548 to 14th September 1549
After the Scottish Parliament had convened at Haddington to endorse the sending of Mary Queen of Scots to France, the English seized and occupied the town.
For the following eighteen months it was bombarded by Scots and mercenary canon while its occupants did their best to remain alive.
Eventually the plague, which was sweeping southern Scotland at the time, persuaded the Duke of Somerset to evacuate his troops, leaving Haddington in ruins.
-
15th June 1567
When Mary Queen of Scots married James Hepburn, 4th Earl of Bothwell as her third husband, many of Scotland's Protestant lords who had previously supported her were incensed.
By then, the majority were convinced that Bothwell was responsible for the murder of Mary's second husband, Lord Darnley.
A month later, the Queen's supporters were challenged near Musselburgh, with Mary being taken prisoner and Bothwell escaping. Mary was imprisoned at Loch Leven Castle and the following month forced to abdicate.
-
13th May 1568
After escaping from her confinement at Loch Leven Castle in Fife, Mary Queen of Scots soon rallied her followers, but was opposed by her half-brother, James Stewart, the Regent Earl of Moray, who led an army to confront her in Renfrewshire.
A cross section of the Scottish nobility still supported her, but as it transpired the ensuing battle only lasted forty-five minutes with the Queen's supporters being dispersed.
Mary and her contingent rode to Dundrennan Abbey in Galloway from which she departed to England, never to return.
Mary Queen of Scots Escaping from Loch Leven Castle by William Craig Shirreff 1786-1805
-
3rd October 1594
The Catholic George Gordon, 6th Earl of Huntly, with a force of 2,000 supporters routed a force of 10,000 commanded by the protestant Earl of Argyll.
The battle represented a victory of artillery and horse over irregular infantry.
-
7th February 1603
This battle is considered one of the most ferocious inter-clan battles.
Prior to this battle, the Magregors raided the Colquhoun Glenfinlas territory in December 1602. They plundered houses and took three hundred cows, one hundred horses and mares, four hundred sheep, and four hundred goats.
In early 1603 two Macgregor clansmen had sought shelter in Colquhoun territory but were refused. They found shelter in the area and slaughtered a sheep for food.
When seized and brought before Alexander Colquhoun, the Clan Colquhoun Chief, they were put to death.
In February 1603 Alastair MacGregor of Glenstrae, the Clan Gregor Chief, rallied his clansmen and marched on the Colquhoun stronghold at Luss to avenge this.
The Colquhouns with about 500 foot and 300 horse men (including Buchanan, Grahams, Lindsays and MacLintocks) were decimated by the Macgregor force of over 400 men (including Macfarlanes and Camerons).
In retaliation, a special Act of Council was passed by the Scottish Government that outlawed the whole of Clan Gregor and forbade anyone, on pain of death, even to bear the surname of MacGregor. Thus began a blood feud between the two clans. In 1784 the MacGregors were allowed to resume their own name and were finally restored to all of the rights and privileges of citizenship.
The feud was finally settled at the end of the 18th century by a handshake on the site of the battle between the two clan chiefs of the time.
-
1st September 1644
The Scottish Government, having embraced the Covenanter Cause, entered the English Civil War and, as a result, King Charles I appointed the ever-loyal James Graham, 1st Marquis of Montrose, as his Scottish commander.
Montrose thereafter embarked upon a triumphant campaign in which he and his followers were often heavily outnumbered.
Assisted by his Clan Donald henchman Alasdair MacColla and his Irish soldiers, he engaged with a substantial Government army near Perth and strategically routed the enemy, who were led by Lord Elcho and James Murray of Gask.
-
13th September 1644
After his victory at Tippermuir, Montrose marched his men on Aberdeen, but the town's civic leaders refused to surrender.
Montrose's drummer was killed by a sniper which sufficiently angered him to order an attack, whereupon the Covenanters were defeated and fled.
-
2nd February 1645
Having returned from a recruitment drive on the west coast, Alasdair MacColla persuaded the Marquis of Montrose to attack the clan lands of the Marquis of Argyll, Chief of Clan Campbell and leader of the Government in Scotland.
On his approach, however, Montrose received information that the Campbell forces had joined the Covenanting army at Inverlochy.
Instead of taking his men on the direct route past Loch Lochy, he therefore decided to go over the mountain range of Allt Na Larach to Glen Roy, where his men were unlikely to be seen.
It was an amazing feat of physical achievement resulting in their taking the enemy entirely by surprise.
In the ensuing slaughter, the climax of which was a Royalist charge, over 1,500 Covenanters were killed.
-
9th May 1645
Having attempted to capture Dundee, James Graham, 1st Marquis of Montrose marched his men north where, at Auldearn in Nairnshire, the Covenanter Commander Sir John Hurry attempted to surprise him.
The Royalist Scots, however, were not to be defeated, and Sir John, and those of his men who survived, sought refuge in Inverness.
-
2nd July 1645
After the Battle of Auldearn, the 1st Marquis of Montrose continued to raid Highland supporters of the Covenant and, fearing a second attack on Aberdeen, Major General William Baillie, now in charge of the Covenanting army, set out to intercept him.
The two armies were of equivalent strength, although the Covenanters had superior horse power.
The Royalist army positioned itself overlooking Alford and, in order to attack, the Covenanters were obliged to cross the river.
Montrose waited until the enemy horses had crossed, and began his attack while the infantry were mid-stream.
In the ensuing carnage, the Covenanters lost three quarters of their foot soldiers.
-
16th August 1645
His resignation having been rejected by the Covenanting leaders, Major General William Baillie wasted no time in supplementing his army with a fresh intake of soldiers.
When Montrose was advised of enemy reinforcements being supplied by Lord Lanark, brother of the 1st Duke of Hamilton, he decided to move between the two forces.
Baillie sought to confront Montrose at Colzium, and once again over three quarters of the Covenanter troops fell in the ensuing carnage.
-
12th June 1648
This minor confrontation was fought between covenanters opposed to the Engagement and government forces.
Although there were remarkably few casualties, the day was won by the Royalists who were led by John Middleton, later created Earl of Middleton, and James Livingston, Earl of Callendar.
-
17th - 19th August 1648
A Scots army under the 1st Duke of Hamilton, who had switched allegiance from the parliamentary party to Charles I, invaded England and, although greatly outnumbering the enemy, was defeated by Oliver Cromwell in Lancashire.
Hamilton was taken prisoner and later executed.
-
27th April 1650
The execution of Charles I by the English Parliament reverberated around Scotland while his exiled son Charles II embarked upon a political game.
He appointed the 1st Marquis of Montrose his Captain General and Lord Governor of Scotland while at the same time negotiating with the Covenanters.
Using Kirkwall on Orkney as his base, Montrose sent Major General Sir John Hurry, who had previously opposed him, but who had now joined the Royalist supporters, across the Pentland Firth to Thurso.
Montrose followed later with several hundred Scandinavian mercenaries, expecting several of the Highland clans to rally to his side, but they did not.
At Carbisdale, the Royalist army met the Covenanter army under Lieutenant Colonel Archibald Strachan, and were overwhelmed.
Montrose escaped the battlefield, but was betrayed a few days later.
He was taken to Edinburgh where he was sentenced to death and executed. On 1st May, Charles II disowned Montrose when he signed the Treaty of Breda in the Netherlands.
Having accepted the Protestant Faith, he landed in Moray on 23rd June to sign the Covenant.
-
3rd September 1650
Infuriated by the Scottish parliament's negotiations with Charles II, the English parliament ordered Oliver Cromwell to invade Scotland, with John Lambert as his second-in-command.
The English army crossed the Border in July, but the Scots at first adopted a scorched earth policy.
In September, convinced that the English were planning to retreat, the Scottish commander David Leslie marched on Dunbar where he planned to intercept Cromwell's men.
Cromwell, suspecting this, re-positioned his men at night and the following day won a resounding victory south of the town.
-
3rd September 1651
On 1st January 1651, Charles was crowned King of Scots at Scone and, with the Scottish Covenanting army now supporting him, he circumnavigated Cromwell's army to march south into England.
When English Royalists failed to rally to his cause, he was overwhelmingly defeated at Worcester. Charles then
-
20th July 1651
After Dunbar, Cromwell and his army moved north into Scotland but were checked by David Leslie at Stirling.
To overcome this, Cromwell gave instructions to General John Lambert for a naval invasion of Fife across the Firth of Forth from South Queensferry.
When the news of Cromwell’s movement was received, Sir Hector MacLean (of Clan MacLean) was dispatched with a division of Highlanders
Lambert had not advanced beyond Inverkeithing, within three miles of North Queensferry, before he found himself intercepted by the royalists. On the morning of July 20, 1651, he drew up his army in battle order, on the rising ground immediately south of Inverkeithing.
According to MacLean history – MacLean called to him the laird of Buchanan (George Buchanan, 18th Chief) and Sir John Brown… to continue the battle. “They are double our number,” added he, “ but what of that; let them come to the sword’s point, there is not a MacLean in my gathering but will undertake two.”
Sir John Brown remarked, that they were engaging their enemies, not only under great numerical disadvantages, but the position of the enemy was another important advantage they had over them.
Sir Hector MacLean quickly replied : “What would you have me do? Would you have me fly, like that cowardly old horseman, Holburn, and be forever the scorn of honest men? Our honour and our loyalty demand that we do our best.” And striking his sword into the ground on the spot on which he stood, he observed: “Let the English traitor’s deputy march on; here, surrounded by his faithful clan, he will find Duard’s chief ready to receive him.”
Borne down by numbers, Sir John’s division took to flight, leaving their leader prisoner in the hands of the enemy and mortally wounded. The desperate purpose of the chief of MacLean to “neither to yield nor fly,” was still his fixed resolve. He formed his undaunted band into a solid body, exhibiting a front in every direction, so as to be better prepared to repulse the attacks which, surrounded at every point as he was, could be directed against him on every side. Even thus encircled, and having with him not more than eight hundred MacLeans and about seven hundred Buchanans and others, MacLean bid defiance to the whole of Lambert’s veteran army, led by the most experienced general under Cromwell.
The two armies drew up facing each other, with the English dug in on the Ferry Hills and the Scots on the lower slopes of Castland Hill, with their right anchored on Whinney Hill and their left on the Hill of Selvege or Muckle Hill, a little to the south of Inverkeithing. Once the deployments had been made, nothing happened for an hour and a half, with each side expecting to be attacked by the other. The trigger for action was a report from Cromwell that Scots reinforcements were marching from Stirling. As the English attacked, Browne on the Scots right led a cavalry charge using the slope and the Scots lancers broke the English cavalry opposite, who were probably inexperienced troopers. However, the English counter-attacked, routing the Scottish cavalry and capturing Browne himself. On the left, the moss troopers were initially successful, but lack of discipline began to tell and they, in turn, were routed.
Both the MacLeans and Buchanans were slaughtered in great numbers; their foes, also suffering as severely. At length the diminished numbers of the Highlanders rendered them an easy prey; still to yield was deemed a dishonourable alternative by the MacLean.
With the rout of the Scots cavalry the battle was effectively over, with relatively little serious fighting at the initial battle lines. Source.
-
19th July 1654
A force of clansmen from Clan Gregor was raised in support of the Royalist Cause by the 9th Earl of Glencairn.
In July, under the Earl of Middleton, it was confronted by Sir Thomas Morgan, the Lord Protector Cromwell's Commander in Chief in Scotland, near Loch Garry on the Drumochter Pass.
Faced with superior numbers, the Royalist soldiers rapidly dispersed.
-
26th November 1666
Following the Restoration of Charles II in 1660, the Scottish Government revealed plans to restore Episcopacy which caused outrage among its Scottish Presbyterian supporters.
In the Pentland Hills, near Edinburgh, a small party of rebellious Covenanters were intercepted and massacred by the Royalist General Tam Dalyell of the Binns.
Over 1,000 prisoners were incarcerated in the churchyard of Greyfriars in Edinburgh.
-
1st June 1679
On hearing that a large Conventicle of Covenanters (a Presbyterian religious service held out-of-doors) was to be held near Kilmarnock Hill in Ayrshire, the Episcopal James Graham of Claverhouse, who had been appointed to put down such seditious gatherings by Charles II, set off to disperse them.
His dragoons, however, became stuck in wet marshland and suffered significant losses.
-
22nd June 1679
James, Duke of Monmouth, natural son of Charles II, was the commander of a Government force which, despite being heavily outnumbered, succeeded in dispersing the Covenanter army in Lanarkshire.
Assisted by James Graham of Claverhouse (later created Viscount Dundee), this effectively dismembered the Covenanting movement, but failed to put a stop to the outlawed Conventicles.
-
22nd July 1680
While a party of Covenanters led by the Reverend Richard Cameron was at worship near Cumnock, they were surrounded and slaughtered by a troop of Dragoons.
-
Or the Battle of Maol Ruadh — August 1688
A territorial battle over the district of Lochaber which took place near Spean Bridge between the tribal conurbation of Clan Chattan, led by Lachlan Mackintosh of Torcastle, and Clan Cameron and the MacDonalds of Keppoch.
A Commission of Fire and Sword had been issued against Keppoch, but when Mackintosh supported by Kenneth Mackenzie of Suddie attempted to reinforce it, they were strongly repelled by a force which included the MacMartins, a sept of Clan Cameron.
The Preamble to the Scotland’s joining the Jacobite uprisings
The Jacobite rising of 1745, also known as the Forty-five Rebellion or simply the '45, was an attempt by Charles Edward Stuart to regain the British throne for his father, James Francis Edward Stuart.
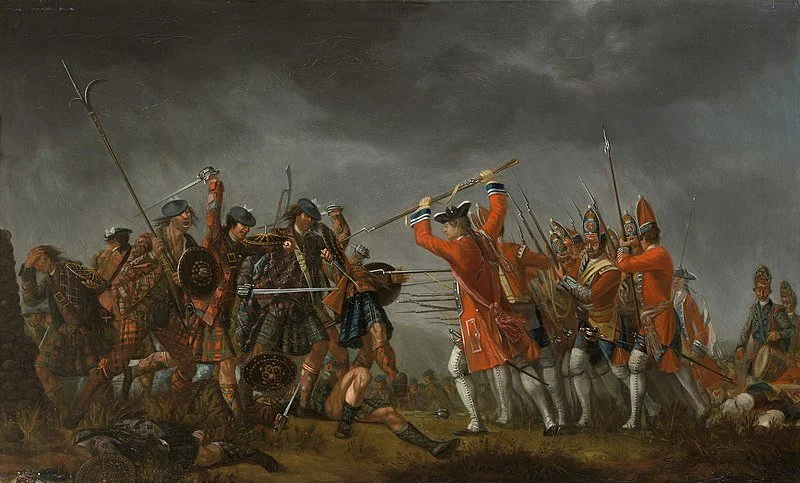
The Battle of Culloden - An Incident in the Rebellion of 1745, David Morier
-
27th July 1689
The invasion of the Protestant William of Orange and the exile of the Catholic James VIII (II of England) had divided Scotland politically.
While the majority of the Catholic and Episcopalian Highlanders remained loyal to the Royal House of Stuart, the largely Presbyterian Lowlanders of Scotland welcomed William and his Protestant wife Mary, James VIII's daughter.
When William and Mary landed in England, James Graham of Claverhouse (now Viscount Dundee), rode north into Perthshire to raise a Highland army in support of the Jacobite Cause.
The Government army was commanded by General Hugh Mackay of Scourie and, marching to relieve the siege of Blair Castle, the two armies met at the Pass of Killiecrankie.
The Government troops were routed and dispersed, but Viscount Dundee was killed in battle.
-
21st August 1689
In the aftermath of Killiecrankie, a violent skirmish took place at Dunkeld which ended in virtually the entire destruction of the town.
Government troops under the command of Lieutenant Colonel William Cleland, a survivor of Drumclog and Bothwell Brig, occupied the town, and were fiercely attacked by the remnants of Dundee's army.
It was a savage confrontation which ended when the exhausted Highlanders retreated back to their original position.
-
1st May 1690
Near Grantown-on-Spey, a large Government army under Sir Thomas Livingston, Commander of the garrison at Inverness, encountered the Jacobite army under General Buchan.
The Jacobites comprised soldiers from Clan Donald, Clan Cameron, Clan MacLean, Clan Macpherson and Clan Grant under Colonel Cannon, but were surprised with a cavalry attack and dispersed into the surrounding hills.
-
Following the death of James VII & I in 1701, the claim to the British throne was taken up by his son, Prince James Francis Edward Stuart, who became known as “The Old Pretender”.
With the death of Queen Anne in 1701, and the British throne passing to the Elector of Hanover, who became George I, there was widespread disaffection.
The Old Pretender had been in correspondence for several years with John Erskine, 22nd Earl of Mar and, in 1715, with the unpopularity of the Hanovarian Government in the ascendancy, called upon him to raise the Highland clans.
By September, Mar had raised 8,000 men.
-
9th-14th November 1715
A Jacobite army under Brigadier William Mackintosh of Borlum crossed the Firth of Forth and marched south to join up with a force raised in Northumberland.
The Highlanders were reluctant to cross the Border, but were reassurance that they would be welcomed.
This was not the case and finding themselves surrounded by the Hanovarian army at Preston, they surrendered.
-
13th November 1715
The Jacobite army led by the Earl of Mar was attacked near Dunblane by the Government army led by John Campbell, 2nd Duke of Argyll.
Although Argyll's forces withdrew, both sides claimed victory.
The following month, The Old Pretender landed at Peterhead, but finding enthusiasm among his supporters at a very low ebb, returned to France.
-
10th June 1719
A force of Spaniards accompanied by William Mackenzie, 5th Earl of Seaforth, George Keith, 10th Earl Marischal, and the Marquess of Tullibardine, son of the 1st Duke of Atholl, landed in Scotland to support the Jacobite Cause.
They established themselves at Eilean Donan Castle where they were joined by Rob Roy Macgregor, Clan Macrae, Cameron of Locheil and Lord George Murray.
When Eilean Donan came under fire from five Royal Navy ships and captured, however, it was found to have been largely abandoned.
At nearby Glenshiel, the Government forces confronted the Spaniards and the Jacobites, but when the support that the Jacobites had been promised from the Lowland Scotland failed to arrive, they scattered.
-
His father having appointed him Prince Regent, Prince Charles Edward Stuart, “The Young Pretender”, raised the Jacobite standard at Glenfinnan on the Scottish mainland to rally the Highland Clans.
With men from Clan Donald and Clan Cameron, he marched on Edinburgh and took up residence at the Palace of Holyrood House.
-
20 September 1745
Also known as Battle of Tranent or Battle of Gladsmuir.
Prince Charles Edward Stuart landed on the west coast of Scotland in July 1745 accompanied by only 9 men carrying a few arms!
Prince Charles gathered together an army of Highlanders and marched into Edinburgh on 16 September 1745.
The Scots, about 2,400 men, were badly equipped, had very few arms and their cavalry was only 40 strong.
Gathered at Dunbar was Sir John Cope who had six squadrons of dragoons and three companies of foot soldiers. Cope’s army numbered 3,000 and some artillery manned by naval gunners.
Cope had a strong position in a corn field and his flanks were protected by marshy meadows.
The Scots couldn’t mount a charge through the marshy meadows, so at 4am they attacked the east flank of Cope’s army.
The Highlanders charged and Cope’s gunners fled, as the advancing Highlanders, with the sun behind them, appeared to outnumber the British army.
The Scots had 30 men killed and 70 wounded. The British lost 500 of the Infantry and Dragoons. Over 1,000 were captured.
-
23rd December 1745
With the intention of putting a stop to Jacobite recruitment, John Campbell, 4th Earl of Loudon, Hanovarian Commander-in-Chief in the Highlands, sent a force of MacLeods, Grants and Munros to confront Lord Lewis Gordon and his Jacobites at Aberdeen. Finding themselves greatly outnumbered, they were driven them back into their own territory.
-
17th January 1746
Having retreated from Derby, the Jacobite army reached Glasgow in January 1746, and moved on to lay siege to Stirling Castle. Meanwhile, the English Commander Lieutenant General Henry Hawley had brought his army from Newcastle to Edinburgh and came face-to-face with the Jacobites at Falkirk. The Government troops were massacred, but the Jacobites failed to press home their advantage. Hawley was soon able to re-group his army in Edinburgh.
-
15th April 1746
Sometimes known as Battle of Bonnar Bridge
Soldiers sent by the 3rd Earl of Cromartie, a Jacobite supporter, had attacked Dunrobin Castle, forcing the 17th Earl of Sutherland to flee. The Jacobites assumed they had won the day but, on marching off, were attacked and taken prisoner by the Sutherland men.
-
16th April 1746
The Battle of Culloden (Blàr Chùil Lodair) was the final confrontation of the Jacobite rising of 1745.
On 16 April 1746, the Jacobite army of Charles Edward Stuart was decisively defeated by a British government force under Prince William Augustus, Duke of Cumberland, on Drummossie Moor near Inverness in the Scottish Highlands.
It was the last pitched battle fought on British soil.
Charles was the eldest son of James Stuart, the exiled Stuart claimant to the British throne.
Believing there was support for a Stuart restoration in both Scotland and England, he landed in Scotland in July 1745: raising an army of Scots Jacobite supporters, he took Edinburgh by September, and defeated a British government force at Prestonpans.
The government recalled 12,000 troops from the Continent to deal with the rising: a Jacobite invasion of England reached as far as Derby before turning back, having attracted relatively few English recruits.
The Jacobites, with limited French military support, attempted to consolidate their control of Scotland, where by early 1746, they were opposed by a substantial government army.
A hollow Jacobite victory at Falkirk failed to change the strategic situation: with supplies and pay running short and with the Government troops resupplied and reorganised under the Duke of Cumberland, son of British monarch George II, the Jacobite leadership had few options left other than to stand and fight.
The two armies eventually met at Culloden, on terrain that gave Cumberland's larger, well-rested force the advantage.
The battle lasted only an hour, with the Jacobites suffering a bloody defeat; between 1,500 and 2,000 Jacobites were killed or wounded,[1][2] while about 300 government soldiers were killed or wounded.
While perhaps 5,000 – 6,000 Jacobites remained in arms in Scotland, the leadership took the decision to disperse, effectively ending the rising.
Culloden and its aftermath continue to arouse strong feelings.
The University of Glasgow awarded the Duke of Cumberland an honorary doctorate, but many modern commentators allege that the aftermath of the battle and subsequent crackdown on Jacobite sympathisers were brutal, earning Cumberland the sobriquet "Butcher".
Efforts were subsequently made to further integrate the Scottish Highlands into the Kingdom of Great Britain; civil penalties were introduced to undermine the Scottish clan system, which had provided the Jacobites with the means to rapidly mobilise an army.

Statue of Allan Stewart (left) and the fictional David Balfour (right), from Robert Louis Stevenson's Kidnapped, on Corstorphine Rd in Edinburgh
-
The Appin Murder of 1752 is one of the most notorious tales of Scottish history, the shooting in the back of government agent Colin Campbell of Glenure.
He was assassinated in an ambush by an unknown hand in the Wood of Lettermore near Ballachulish by the side of Loch Linnhe in Argyll.
Two days later, James Stewart from Glenduror known in Gaelic as Seumas a Ghlinne was taken in custody as an accessory to murder.
The murder was assumed to have been committed by his foster son Allan Breac Stewart.
On May 14th 1752, Colin Roy Campbell of Glenure, the factor to the forfeited estates of the Charles Stewart V of Ardsheal was killed.
Shot in the back by what is described as a marksman in the wood of Lettermore - although the guns of the time don´t really allow for shooting like that.
The search for a culprit targeted the local clan, the Stewarts of Appin, who had recently suffered evictions on Campbell’s orders because of their support for the Jacobite cause.
Investigations saw the chief suspect, Allan Breac Stewart flee, leaving people to turn to the last remaining leader of the Stewarts, James Stewart, a tacksman who would later be arrested and tried for the crime.
He had led local opposition to attempts to evict tenants from the land which had been forfeited by the British government for the clan´s involvement in the Jacobite Rising of 1745.
It was this that gave the murder and the trial of James Stewart or James of Glen a political dimension with the involvement of the government.
On the afternoon of May 14, 1752, Campbell and three companions made their way slowly along Loch Linnhe side.
The following day evictions for non-payment of rent among some Stewart tenants were to take place.
As they passed through the Wood of Lettermore a single shot suddenly rang from the hillside.
Immediately Campbell slumped in the saddle wounded. “Oh, I am dead”, he shouted. “Take care of yourselves, he’s going to shoot you”. Or words like that (accounts differ).
Lawyer Mungo Campbell, Glenure’s nephew, and riding close to him, saw a figure on the hillside wearing a short, dark coat and carrying a gun.
Yet his first thought was that the man was too far away to have fired the shot. One shot was fired, but two bullets had passed through Glenure’s body.
And so from the first few seconds after the crime, the Appin mystery began to unfold . . .
The death of Glenure, immediately set in motion an extraordinary chain of events.
The King in London was informed.
The Government, still jittery after being almost overthrown six years previously by the Jacobites thought that Glenure’s killing was the first shot of another rebellion.
The order was given from London and Edinburgh: stop it in its tracks, use whatever force or means necessary and make an example of the perpetrators.
That single shot sparked one of the biggest murder hunts in Scottish history.
Even shipping in the River Forth was intercepted.
On September 2nd James Stewart (half brother to Ardsheal from whom the estates had been confiscated) was moved from Fort William to Inveraray,.
His trial started on 21st of September eleven of the fifteen jurors were Campbells in the country town of Argyllshire and the seat of the staunchly government supporting dukes of Argyllshire.
The duke himself, Archibald Campbell presided over the court that tried Stewart so it was unlikely that any verdict other than a guilty verdict would have been returned.
Four days later he was found guilty of aiding and abetting Allan Breac Stewart in the murder and executed on the knoll above the Ballachulish Ferry on 8 November.
His body was left hanging on the gallows for more than 3 years under guard.
It is claimed that only two of the old families in the area still possess the famous "secret" of the true identity of the murderer, although several others claim to do so.
In 2001, Anda Penman, an 89-year-old descendant of the Stewarts of Appin, revealed what she alleged to be a long-held family secret.
She said the murder was planned by four young Stewart lairds without the sanction of James of the Glens.
There was a shooting contest among them and that the assassination was committed by the best marksman among the four, the young Donald Stewart of Ballachulish.
-
The Highland Clearances were almost over when crofters on Skye decided to fight the government, sparking the last battle fought in Britain, on April 17, 1882.
The crofters refused to pay their rents and fought 50 police who tried to serve eviction notices. The violent battle eventually resulted in the crofters Act.
Highlanders had survived for centuries by crofting - living off a stretch of land for which they paid rent to their landlords.
The farmers and land owners supplemented their meagre income with the lucrative kelp trade - seaweed, used in glassmaking, bleach and soap during the Napoleonic wars.
But peace with France in 1815 ended this industry and the landlords turned their attention to sheep grazing, which required evicting their kinsmen from the crofts.
In 1882, the crofters of Skye refused to pay rent to Lord MacDonald until their animal grazing rights were returned.
The Lord turned to the law to evict the crofters, and in April a sheriff's officer was sent to issue an ejection summons to the crofters.
The angry crofters forced the officer to burn the document, and the Sheriff of Inverness requested assistance from the Glasgow constabulary to enforce the law.
Fifty policemen were sent and arrived at the Braes, a district near Portree on Skye.
The crofters were surprised at first, but soon around a hundred men, women and children met the policemen armed with sticks and stones.
Several people were injured; five men were arrested and fines were imposed on some at Inverness court.
This confrontation became known as the Battle of the Braes. Its claim to be the last land battle fought on British shores is an exaggeration – it was more of a land dispute than any pitched battle.
It became clear after the struggle that the Highlanders would not be evicted without military assistance.
The confrontation received widespread publicity, sympathetic to the Highlanders, from journalists who had travelled with the policemen to Skye.
Parliament, unwilling to use the army to force the crofters to comply and pushed by public sentiment, passed a series of measures granting the crofters more security in their tenure.
The confrontation is celebrated with a monument on Skye and through Scottish folk songs.
A cairn was erected near the scene on behalf of all the crofters of Gaeldom, six miles from Portree.
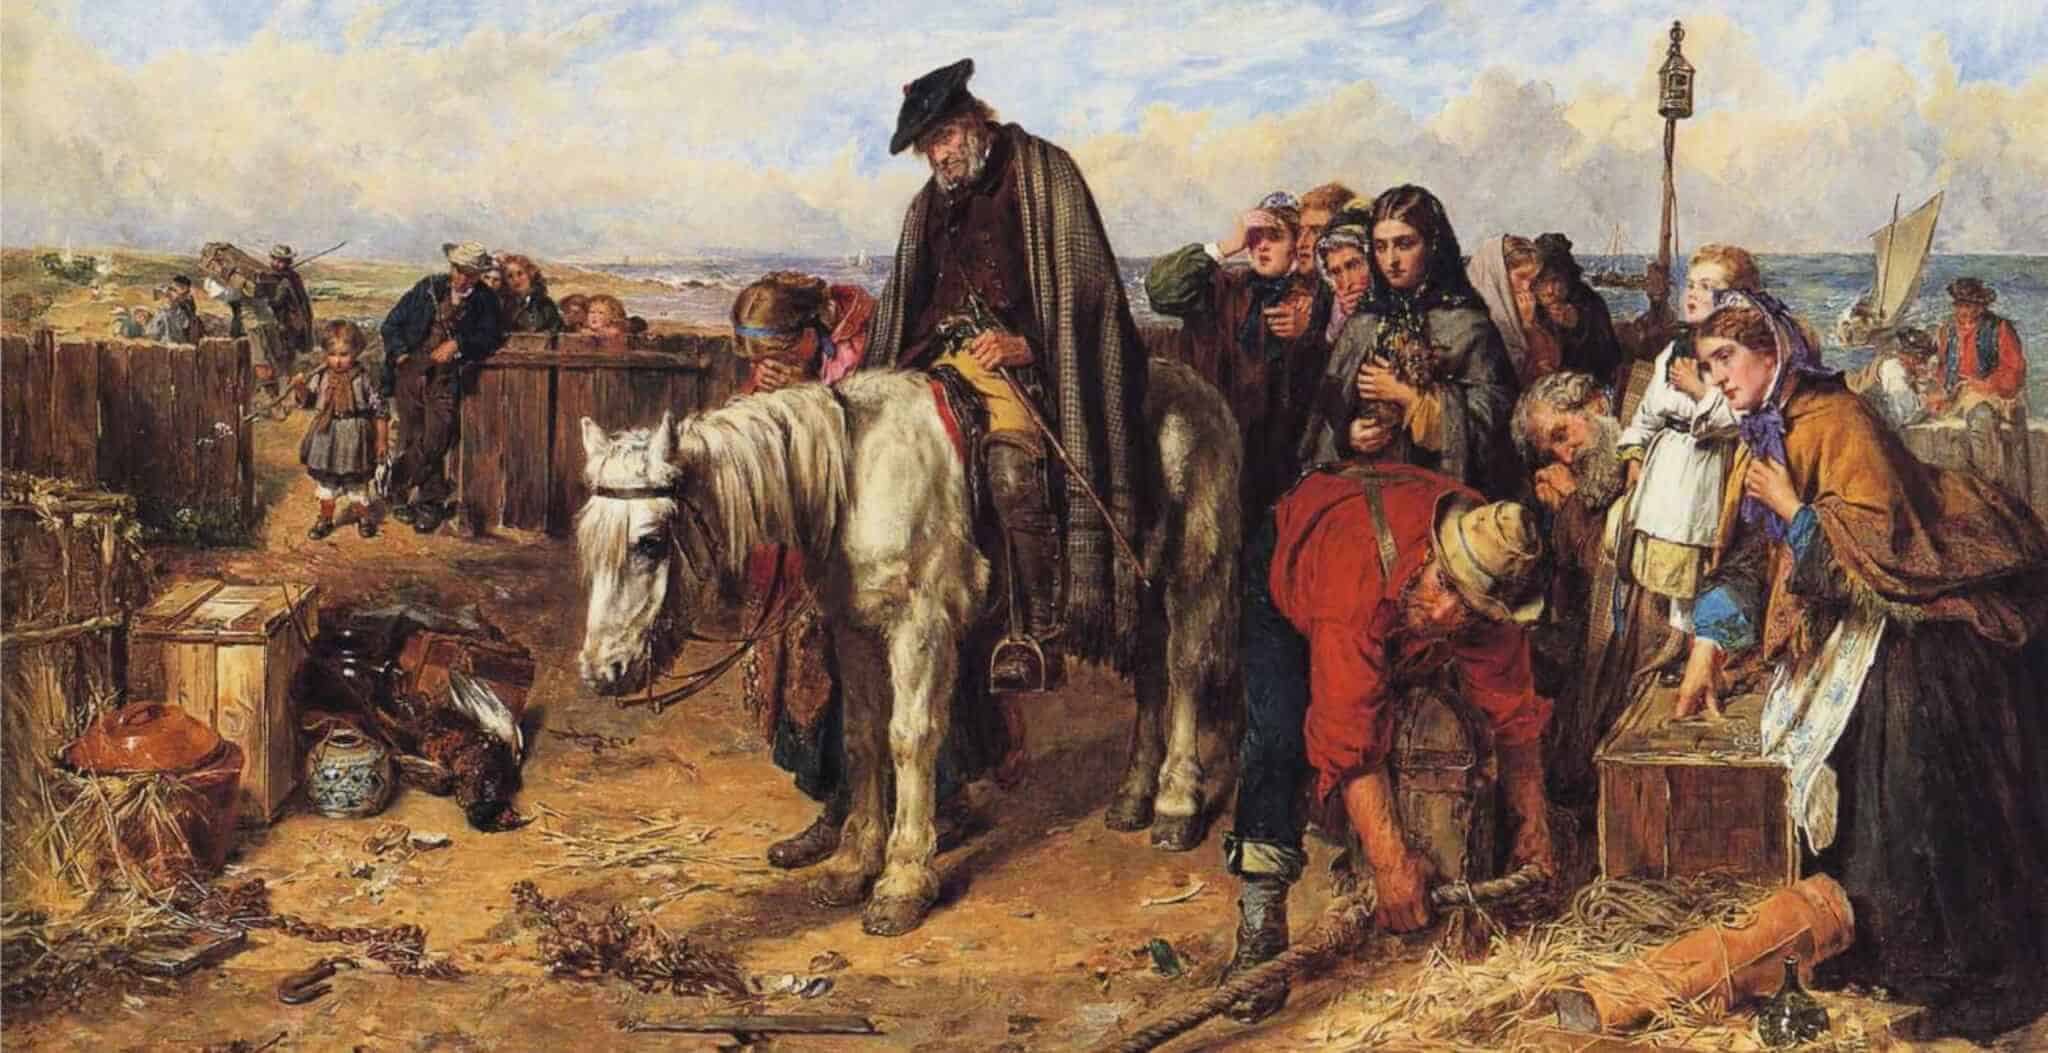
Battle of the Braes 1882
